


3D Paper Cut Light Box: A Guide to Crafting and Illumination
Introduction
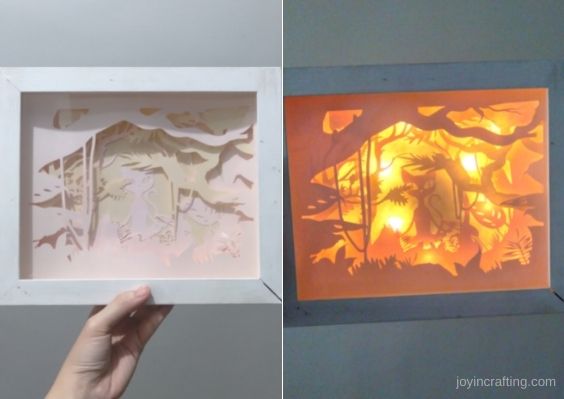
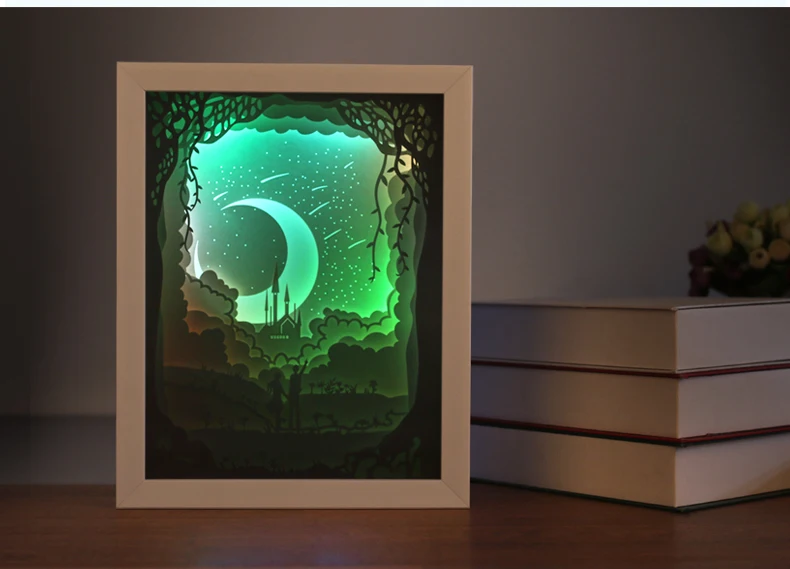
3D paper cut light boxes have emerged as a captivating and versatile form of artistic expression. Combining the intricate beauty of paper cutting with the ethereal glow of light, these captivating creations offer a mesmerizing spectacle that transforms any space into a realm of enchantment. This comprehensive guide delves into the art of crafting 3D paper cut light boxes, empowering you to create your own stunning masterpieces.


Table of Content
Materials and Tools
- Cardstock: Heavy-weight cardstock in various colors and thicknesses
- Light source: Battery-operated LED string lights or a small lantern
- Glue: Acid-free glue or double-sided tape
- Cutting tools: Craft knife, scissors, and a cutting mat
- Ruler and pencil: For precise measurements and lines
- Template or design: Optional, for guidance or inspiration

Tools:
- Free Shadow Box Card Paper Light Box Template Free Shadow Box Card Paper Light Box Template: A Comprehensive Guide
- Printable Paper Cut Shadow Box Templates Printable Paper Cut Shadow Box Templates: A Guide To Creating Stunning 3D Artwork
- Shadow Box Paper Shadow Box Paper: A Comprehensive Guide
- Free 3d Shadow Box Svg Free 3D Shadow Box SVG: Elevate Your Papercraft Creations
- Free Papercut Light Box Templates Free Papercut Light Box Templates: A Comprehensive Guide To Illuminate Your Creations
- Cardstock: Heavy-weight cardstock in various colors and thicknesses
- Light source: Battery-operated LED string lights or a small lantern
- Craft knife: A sharp and precise knife for intricate cutting
- Scissors: For cutting larger shapes and outlines
- Cutting mat: A protective surface to prevent damage to your work surface
- Ruler and pencil: For accurate measurements and lines
- Design: Sketch or find a suitable design for your light box. Consider the size, shape, and complexity of the design.
- Template: If desired, create a template by tracing the design onto tracing paper or a thin sheet of cardstock.
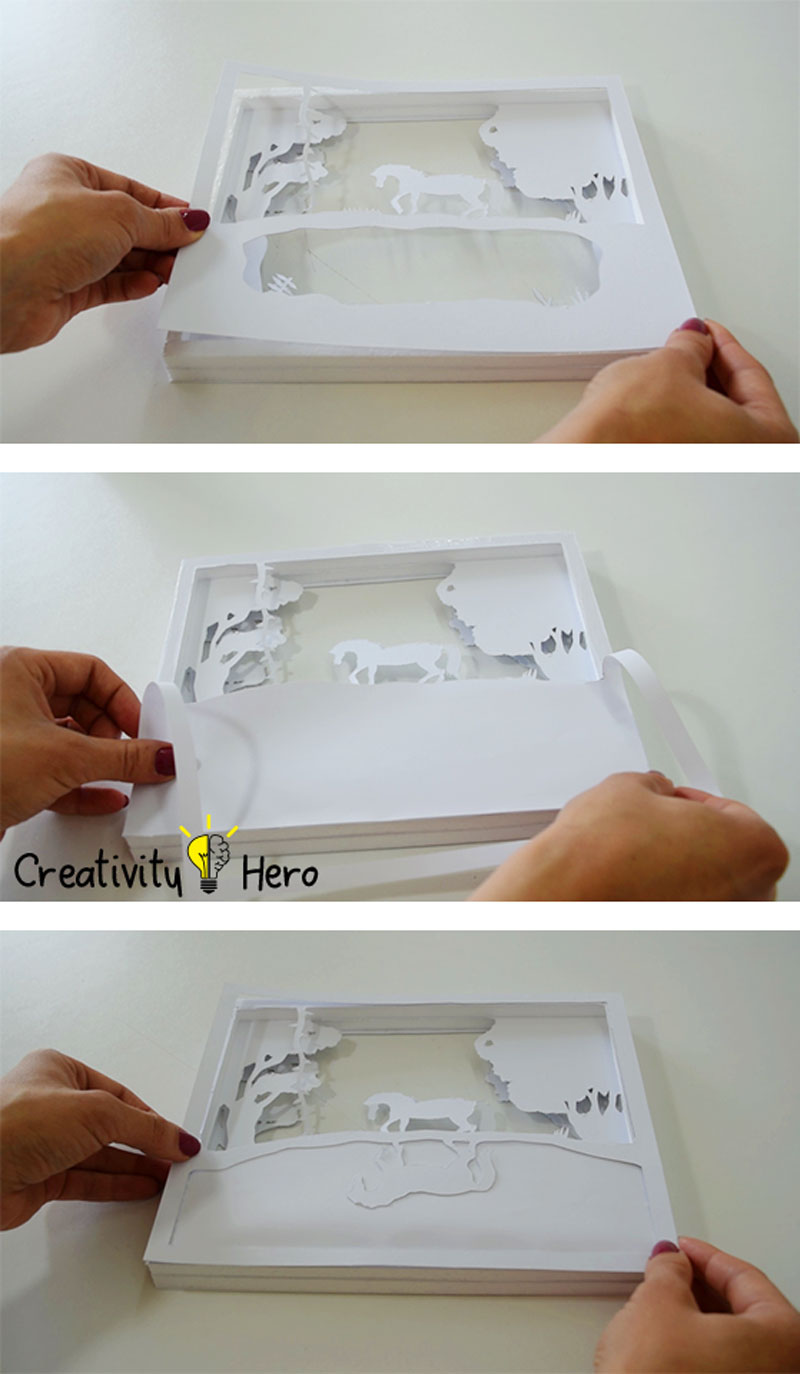
- Cut the layers: Use the template or design as a guide to cut out multiple layers of cardstock. Each layer will represent a different depth and perspective in the final light box.
- Intricate cutting: For intricate designs, use a sharp craft knife and cut carefully along the lines.
- Assemble the layers: Layer the cut pieces together, aligning them precisely. Use glue or double-sided tape to secure the layers.
- LED string lights: Insert battery-operated LED string lights into the light box through a small opening. Distribute the lights evenly to create a diffused glow.
- Lantern: Place a small lantern inside the light box. Adjust the lantern’s position to achieve the desired lighting effect.
- Frame: Optional, but a frame can enhance the presentation and protect the light box.
- Embellishments: Add embellishments such as beads, sequins, or glitter to enhance the visual appeal.
- Use thick cardstock: Heavier cardstock will provide stability and prevent warping.
- Cut carefully: Precision cutting is crucial for achieving clean and crisp lines.
- Experiment with layers: Vary the thickness and number of layers to create depth and dimension.
- Consider the lighting: The type and placement of the light source will significantly affect the overall effect.
- Allow for ventilation: Provide small openings for ventilation to prevent heat buildup from the light source.
- Use heavy-weight cardstock with a thickness of at least 65 lb (176 gsm).
- Yes, you can experiment with other materials such as vellum, tracing paper, or even thin wood veneers.
- Use LED string lights that generate minimal heat.
- Allow for ventilation by providing small openings in the light box.
- It is difficult to modify the design once the light box is assembled. Plan your design carefully before cutting and assembling.
- Use a soft, dry cloth to gently dust the light box. Avoid using water or cleaning solutions that could damage the paper.
3D paper cut light boxes have emerged as a captivating and versatile form of artistic expression. Combining the intricate beauty of paper cutting with the ethereal glow of light, these captivating creations offer a mesmerizing spectacle that transforms any space into a realm of enchantment. This comprehensive guide delves into the art of crafting 3D paper cut light boxes, empowering you to create your own stunning masterpieces.
Materials and Tools
Materials:


Step-by-Step Instructions
1. Design and Template Preparation

2. Cutting the Layers

3. Creating the Light Source
4. Finishing Touches
Tips and Techniques
Conclusion
Creating 3D paper cut light boxes is an art form that combines creativity, precision, and a touch of magic. By following these step-by-step instructions and incorporating the tips and techniques provided, you can craft your own captivating masterpieces that will illuminate your space with enchanting beauty.
FAQs
1. What is the best type of cardstock to use?
2. Can I use other materials besides cardstock?
3. How do I prevent the light box from overheating?
4. Can I change the design after the light box is assembled?
5. How can I clean the light box?


