


3D Silhouette Light Box Template: A Comprehensive Guide for Enhancing Your Artistic Expressions
Introduction
3D silhouette light boxes are captivating creations that blend the allure of paper cutting with the enchantment of illuminated art. These intricate structures cast enchanting shadows, transforming ordinary spaces into mesmerizing displays. Whether you’re an avid crafter, a seasoned artist, or simply seeking a unique way to express yourself, a 3D silhouette light box template can unlock endless possibilities.
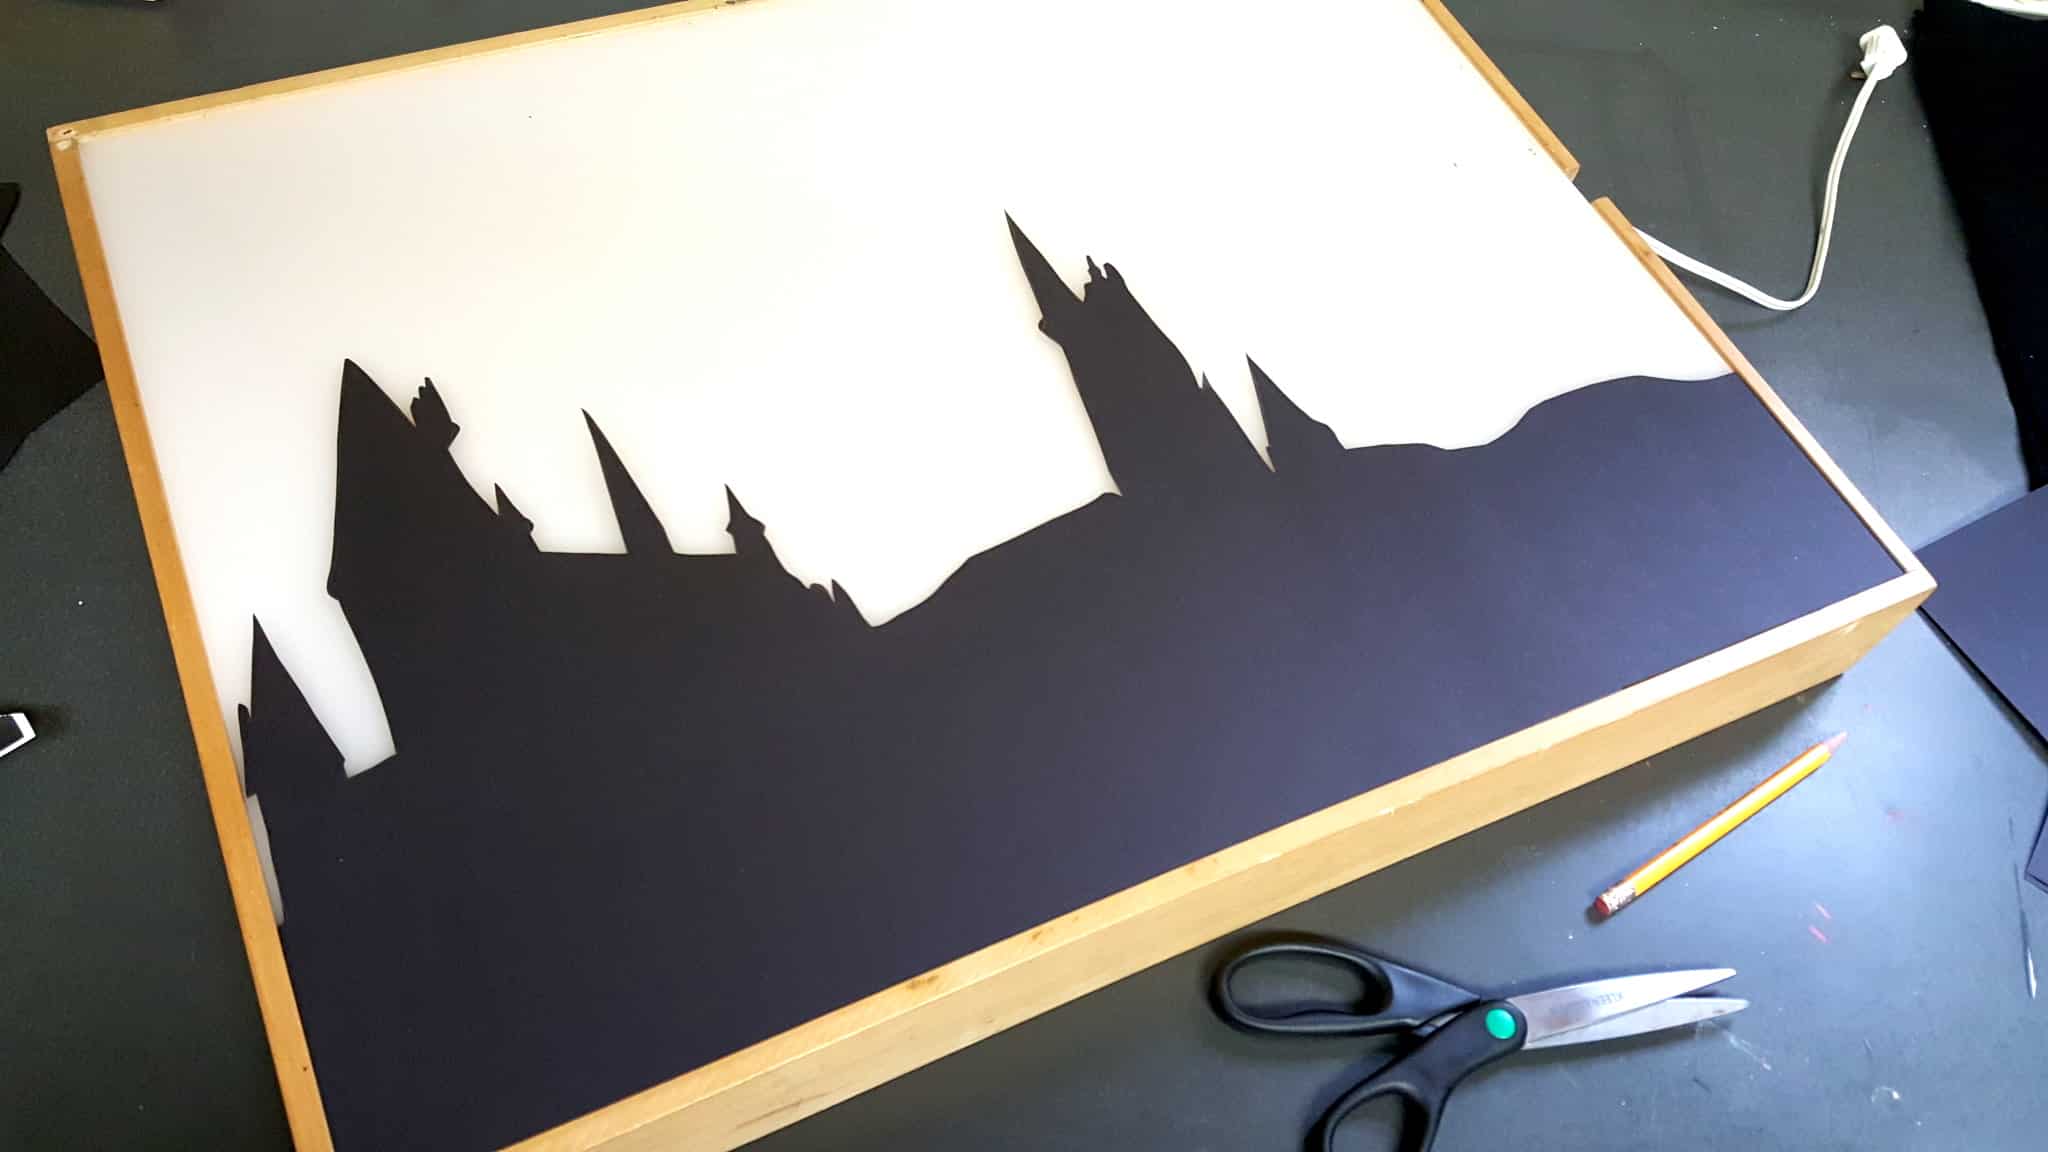

Table of Content
- 1 3D Silhouette Light Box Template: A Comprehensive Guide for Enhancing Your Artistic Expressions
- 1.1 Introduction
- 1.2 Understanding the Concept of 3D Silhouette Light Boxes
- 1.2.1 How it Works
- 1.3 Creating Your Own 3D Silhouette Light Box: A Step-by-Step Guide
- 1.3.2 Materials You’ll Need:
- 1.4 Understanding the Concept of 3D Silhouette Light Boxes
- 1.4.3 What is a 3D Silhouette Light Box?
- 1.4.4 How it Works
- 1.4.5 Instructions:
- 1.5 Design Considerations for 3D Silhouette Light Boxes
- 1.5.6 Choosing the Right Template
- 1.5.7 Paper Selection
- 1.5.8 Lighting Effects
- 1.5.9 Layer Arrangement
- 1.6 Inspiration and Applications of 3D Silhouette Light Boxes
- 1.6.10 Creative Expressions
- 1.6.11 Home Decor
- 1.6.12 Special Occasions
- 1.6.13 Commercial Use
- 1.7 Conclusion
- 1.8 FAQs
- 1.8.14 What is the best paper to use for a 3D silhouette light box?
- 1.8.15 How do I ensure that the layers of my light box align properly?
- 1.8.16 Can I use other light sources besides LED strips or fairy lights?
- 1.8.17 How can I add color or embellishments to my light box?
- 1.8.18 Are there any specific templates that are recommended for beginners?
Understanding the Concept of 3D Silhouette Light Boxes
A 3D silhouette light box is a three-dimensional artwork that utilizes layered paper cutouts to create depth and dimension. When illuminated from behind, the intricate patterns cast shadows, revealing a captivating interplay of light and darkness.
How it Works
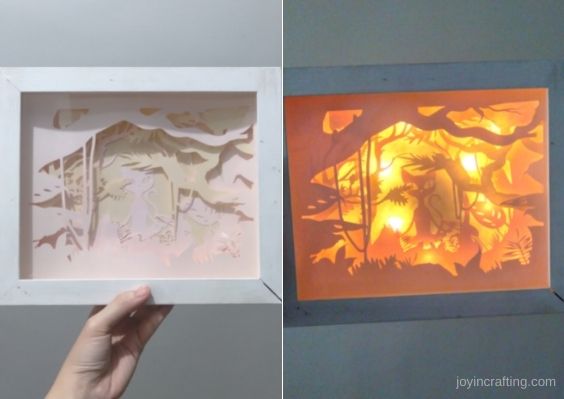
The foundation of a 3D silhouette light box is a light source, typically an LED strip or battery-operated fairy lights. This light source is placed behind the layered paper cutouts, which are carefully arranged to create the desired silhouette. The combination of light and shadows brings the artwork to life, casting enchanting patterns on its surroundings.
Creating Your Own 3D Silhouette Light Box: A Step-by-Step Guide
Materials You’ll Need:
- 3D silhouette light box template
- Cardstock or thick paper
- Craft knife or X-Acto knife
- Cutting mat
- 3d Lighted Shadow Box 3D Lighted Shadow Boxes: A Comprehensive Guide To Crafting And Displaying Illuminated Masterpieces
- 3d Paper Shadow Box 3D Paper Shadow Box: A Step-by-Step Guide To Creating Stunning Paper Art
- Light Box Svg Free Light Box SVG Free: Elevate Your Designs With Stunning Vector Graphics
- Diy Light Shadow Box DIY Light Shadow Box: A Step-by-Step Guide To Illuminate Your Memories
- Free Svg For Shadow Box Free SVG For Shadow Box: A Comprehensive Guide To Enhance Your Creations
- Ruler or T-ruler
- LED strip or fairy lights
- Glue or double-sided tape
- Optional: paint, markers, or embellishments


3D silhouette light boxes are captivating creations that blend the allure of paper cutting with the enchantment of illuminated art. These intricate structures cast enchanting shadows, transforming ordinary spaces into mesmerizing displays. Whether you’re an avid crafter, a seasoned artist, or simply seeking a unique way to express yourself, a 3D silhouette light box template can unlock endless possibilities.
Understanding the Concept of 3D Silhouette Light Boxes
What is a 3D Silhouette Light Box?

A 3D silhouette light box is a three-dimensional artwork that utilizes layered paper cutouts to create depth and dimension. When illuminated from behind, the intricate patterns cast shadows, revealing a captivating interplay of light and darkness.
How it Works
The foundation of a 3D silhouette light box is a light source, typically an LED strip or battery-operated fairy lights. This light source is placed behind the layered paper cutouts, which are carefully arranged to create the desired silhouette. The combination of light and shadows brings the artwork to life, casting enchanting patterns on its surroundings.

Instructions:

-
Prepare Your Template: Download and print the desired 3D silhouette light box template.
-
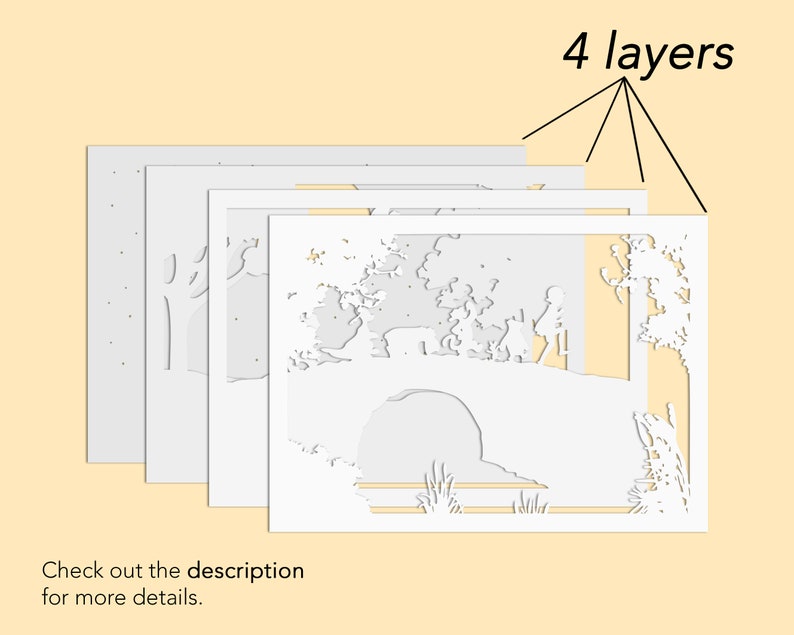
Transfer the Design to Cardstock: Trace the template onto cardstock and carefully cut out the individual layers using a craft knife or X-Acto knife.
-
Assemble the Layers: Arrange the layers in order, starting from the back and working your way forward. Use glue or double-sided tape to adhere the layers together, ensuring that they align precisely.
-
Add Lighting: Attach the LED strip or fairy lights to the back of the assembled box, positioning them to evenly illuminate the silhouette.
-
Optional: Enhance the Design: If desired, you can paint, color, or embellish the layers before assembling the box. This allows for further personalization and artistic expression.
Design Considerations for 3D Silhouette Light Boxes
Choosing the Right Template
The template you select will determine the overall design and theme of your light box. Consider your personal preferences, the intended purpose of the artwork, and the available space where it will be displayed.
Paper Selection
The choice of paper or cardstock will impact the durability and aesthetic of your light box. Opt for thick, high-quality paper that can withstand the cutting process and provide a sturdy base for the artwork.
Lighting Effects
The type and placement of lighting can dramatically alter the ambiance and impact of your light box. Experiment with different light sources, such as warm or cool LED strips, or battery-operated fairy lights, to achieve the desired effect.
Layer Arrangement
The arrangement of the layers is crucial for creating depth and dimension. Consider the perspective, scale, and overlap of the layers to achieve a cohesive and visually appealing composition.
Inspiration and Applications of 3D Silhouette Light Boxes
Creative Expressions
3D silhouette light boxes offer endless possibilities for creative expression. Use them to depict landscapes, portraits, abstract designs, or personal narratives.
Home Decor
These illuminated artworks can transform any room into a captivating space. Display them on walls, shelves, or as standalone centerpieces to add a touch of whimsy and elegance.
Special Occasions
Create personalized light boxes for special occasions such as birthdays, anniversaries, or holidays. They make unique and memorable gifts that will be cherished for years to come.
Commercial Use
3D silhouette light boxes can be used for commercial purposes, such as branding, signage, or product displays. Their captivating nature draws attention and creates a memorable impression.
Conclusion
3D silhouette light boxes are a versatile and rewarding art form that allows you to express your creativity and enhance your surroundings. With the right template, materials, and a touch of imagination, you can create stunning illuminated artworks that will captivate the senses and inspire awe. Whether you’re a beginner or an experienced artist, the possibilities with 3D silhouette light boxes are boundless.
FAQs
What is the best paper to use for a 3D silhouette light box?
Cardstock or thick paper is recommended for its durability and ability to hold the shape of the cutouts.
How do I ensure that the layers of my light box align properly?
Use a ruler or T-ruler to measure and align the layers carefully before gluing them together.
Can I use other light sources besides LED strips or fairy lights?
Yes, you can experiment with different light sources such as incandescent bulbs or candles, but be sure to consider the heat output and safety precautions.
How can I add color or embellishments to my light box?
Before assembling the layers, you can paint, color, or add embellishments such as glitter or sequins to enhance the design.
Are there any specific templates that are recommended for beginners?
Templates with simpler designs and fewer layers are recommended for beginners, allowing them to focus on the cutting and assembly process.


