


Shadow Box with Cricut: A Comprehensive Guide to Creating Stunning 3D Art
Introduction
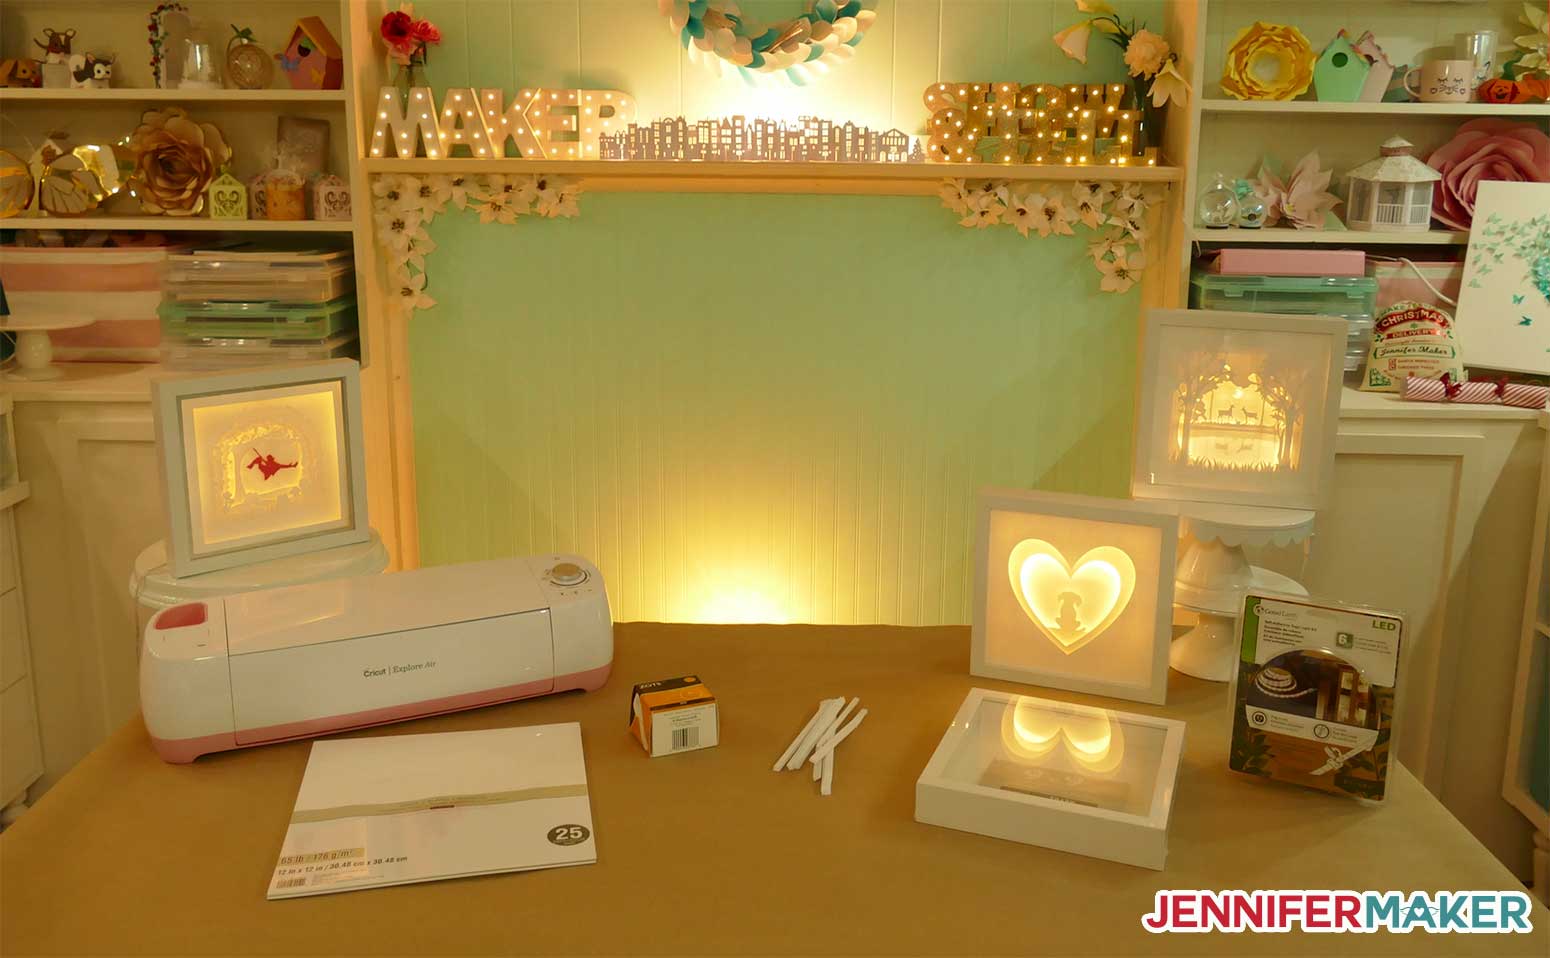
A shadow box is a captivating display that adds depth and dimension to any room. With the versatility of a Cricut machine, you can elevate your shadow box creations to a whole new level. This comprehensive guide will empower you to design, cut, and assemble mesmerizing shadow boxes that will impress your family and friends.


Table of Content
- 1 Shadow Box with Cricut: A Comprehensive Guide to Creating Stunning 3D Art
- 1.1 Introduction
- 2 Materials You’ll Need
- 3 H2: Designing Your Shadow Box
- 3.2 H3: Choosing a Theme
- 4 Materials You’ll Need
- 4.3 H3: Selecting Images and Text
- 4.4 H3: Designing Layers
- 5 H2: Using Cricut to Cut Your Designs
- 5.5 H3: Importing and Preparing Images
- 5.6 H3: Choosing the Right Materials
- 5.7 H3: Cutting Your Layers
- 6 H2: Assembling Your Shadow Box
- 6.8 H3: Preparing the Layers
- 6.9 H3: Layering and Gluing
- 6.10 H3: Finishing Touches
- 7 Conclusion
- 8 FAQs
- 8.11 Q: What is the best type of paper to use for shadow boxes?
- 8.12 Q: Can I use other materials besides paper in my shadow box?
- 8.13 Q: How do I preserve my shadow box from fading or damage?
Materials You’ll Need

H2: Designing Your Shadow Box

H3: Choosing a Theme
A shadow box is a captivating display that adds depth and dimension to any room. With the versatility of a Cricut machine, you can elevate your shadow box creations to a whole new level. This comprehensive guide will empower you to design, cut, and assemble mesmerizing shadow boxes that will impress your family and friends.
- Printable Paper Cut Shadow Box Templates Printable Paper Cut Shadow Box Templates: A Guide To Creating Stunning 3D Artwork
- Shadow Box Svg Free Shadow Box SVG Free: Unleash Your Creativity With Limitless Designs
- Free Cricut Shadow Box Template Free Cricut Shadow Box Template: Elevate Your Home Decor With Personalized Art
- Free Shadow Box Svg File Free Shadow Box SVG File: Elevate Your Papercrafting Projects
- Svg Shadow Box Free SVG Shadow Box: A Comprehensive Guide To Creating Stunning 3D Effects
Materials You’ll Need
- Shadow box frame
- Cardstock or other sturdy paper
- Cricut machine
- Travel memories
- Family photos
- Nature scenes
- Quotes and affirmations
- Seasonal decorations
The first step is to decide on a theme for your shadow box. Consider your personal interests, hobbies, or special occasions. Some popular themes include:


H3: Selecting Images and Text

Once you have a theme, gather images and text that align with it. You can use your own photos, download images from online sources, or purchase commercial-use graphics.
H3: Designing Layers
In a shadow box, layers create depth and visual interest. Start with a background layer, then add additional layers for images, text, and embellishments. Arrange the layers in a way that creates a cohesive and visually appealing composition.
H2: Using Cricut to Cut Your Designs

H3: Importing and Preparing Images
Upload your images and text into Cricut Design Space. Adjust the size and placement as needed. Use the Contour tool to isolate specific elements of your images.
H3: Choosing the Right Materials
Select cardstock or other sturdy paper that is suitable for cutting with your Cricut machine. Consider the thickness and color of the paper when selecting it.
H3: Cutting Your Layers
Place your cutting mat on the Cricut machine. Load the paper and follow the prompts on the screen. Ensure that the cutting blade is sharp and the pressure settings are appropriate for the material you are using.
H2: Assembling Your Shadow Box
H3: Preparing the Layers
Once your layers are cut, use weeding tools to remove any excess material. Apply glue or adhesive to the back of each layer and allow it to dry slightly.
H3: Layering and Gluing
Start with the background layer and glue it into the shadow box. Layer the remaining elements on top, adhering them securely. Use spacers or foam squares to create additional depth.
H3: Finishing Touches
Add embellishments such as sequins, beads, or ribbon to enhance the visual appeal of your shadow box. Consider using a frame that complements the design and theme.
Conclusion
Creating a shadow box with Cricut is a rewarding and versatile craft that allows you to showcase your creativity and preserve special memories. By following the steps outlined in this guide, you can design, cut, and assemble stunning shadow boxes that will add a touch of elegance and personalization to your home.
FAQs
Q: What is the best type of paper to use for shadow boxes?
A: Cardstock, scrapbook paper, and matte photo paper are all suitable options. Choose a paper that is sturdy enough to hold its shape and will not warp over time.
Q: Can I use other materials besides paper in my shadow box?
A: Yes, you can incorporate various materials such as fabric, wood, metal, and plastic into your shadow box designs. Use your creativity and experiment with different materials to add texture and depth.
Q: How do I preserve my shadow box from fading or damage?
A: To protect your shadow box from fading, use UV-resistant materials and avoid placing it in direct sunlight. Consider using archival-quality paper and adhesives to prevent discoloration and deterioration over time.


