How to Make a Layered Shadow Box with Cricut: A Comprehensive Guide
Introduction
A layered shadow box is a captivating way to showcase cherished memories, artwork, or collectibles. With the versatility of a Cricut machine, you can create stunning layered designs that add depth and dimension to your display. This comprehensive guide will walk you through the entire process, from material selection to assembly, empowering you to craft eye-catching layered shadow boxes that will elevate your home décor.


Table of Content
Materials You’ll Need


Choosing the Right Shadow Box
A layered shadow box is a captivating way to showcase cherished memories, artwork, or collectibles. With the versatility of a Cricut machine, you can create stunning layered designs that add depth and dimension to your display. This comprehensive guide will walk you through the entire process, from material selection to assembly, empowering you to craft eye-catching layered shadow boxes that will elevate your home décor.
- 3D Svg Shadow Box 3D SVG Shadow Box: A Comprehensive Guide To Creating Stunning Visual Effects
- Cricut Shadow Box Template Cricut Shadow Box Template: A Comprehensive Guide
- Shadow Box Paper Shadow Box Paper: A Comprehensive Guide
- 3d Shadow Box Templates Free 3D Shadow Box Templates Free: Unleash Your Creativity With Stunning Shadow Art
- Shadow Box 3d Art Shadow Box 3D Art: A Comprehensive Guide To Creating Depth And Dimension
Materials You’ll Need
- Shadow box frame
- Cardstock or paper in various colors and textures
- Cricut machine
- Cut the Base Layer: This layer will form the foundation of your shadow box. Cut it from a sturdy cardstock or paper that will support the weight of the other layers.
- Cut the Intermediate Layers: These layers will add depth and dimension. Choose contrasting colors or textures to create visual interest.
- Cut the Top Layer: This layer will frame the contents of your shadow box. It can be a simple shape or an intricate design.
- Score the Layers: Use a scoring tool or stylus to create creases along the edges of each layer. This will make it easier to fold and assemble the layers.
- Apply Adhesive: Spread a thin layer of glue or adhesive to the back of each layer, except for the top layer.
- Assemble the Layers: Start with the base layer and carefully stack the intermediate layers on top, aligning the scored edges.
- Secure the Top Layer: Apply glue or adhesive to the edges of the top layer and carefully place it over the contents. Press down firmly to secure it.
- Add Embellishments (Optional): You can add embellishments such as ribbons, glitter, or beads to enhance the visual appeal of your shadow box.
- Display Your Masterpiece: Hang or place your layered shadow box in a prominent location where it can be admired.

The first step is to select a suitable shadow box frame. Consider the size and shape of the items you wish to display. Choose a frame that is deep enough to accommodate multiple layers and allows for easy access to the contents.

Design and Cut the Layers
Using your Cricut machine and design software, create the desired shapes for each layer. You can use pre-made designs from Cricut Design Space or design your own. Ensure that the layers are slightly different in size to create a tiered effect.


Prepare the Layers

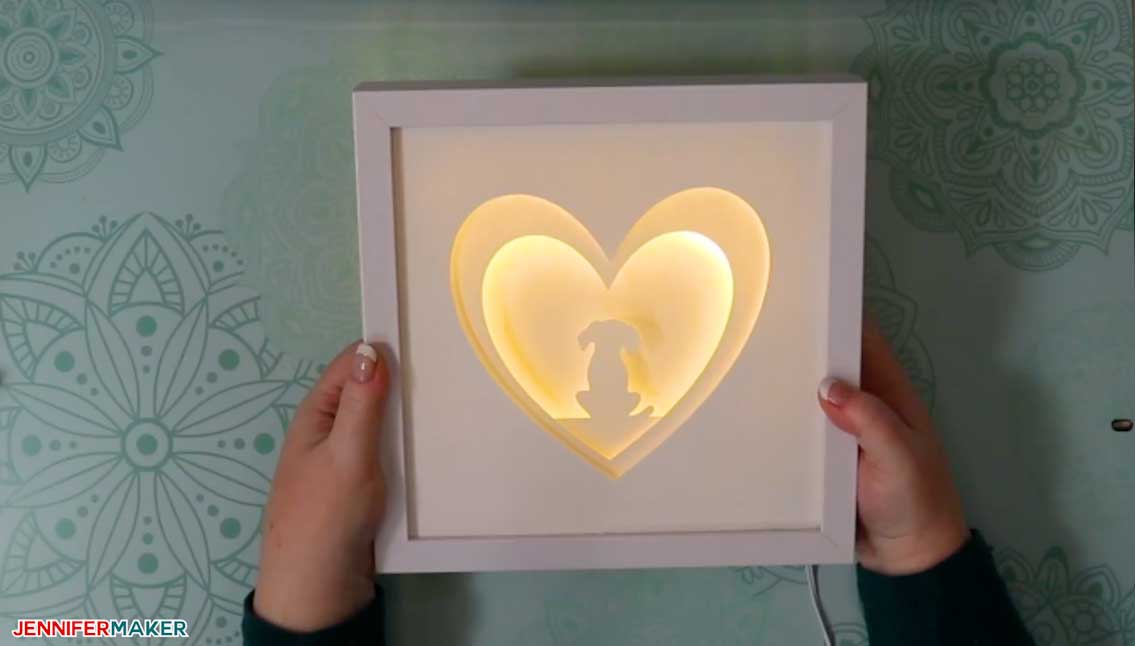
Add the Contents
Once the layers are assembled, it’s time to add your chosen contents. You can include photos, artwork, memorabilia, or any other items that you wish to display. Use tweezers to gently place the contents onto the layers.
Finishing Touches
Conclusion
Creating a layered shadow box with Cricut is a rewarding and creative endeavor that allows you to showcase your cherished memories in a visually stunning way. By following the steps outlined in this guide, you can design and assemble intricate layered displays that will add depth and personality to your home décor.
FAQs
Q: What types of paper can I use for my shadow box layers?
A: You can use cardstock, construction paper, scrapbook paper, or any other type of paper that is compatible with your Cricut machine.
Q: How do I ensure that my layers are aligned correctly?
A: Use a ruler or alignment tool to measure and align the layers before applying glue. You can also score the edges of the layers to create a guide for assembly.
Q: Can I use other materials besides paper for my layers?
A: Yes, you can use materials such as fabric, wood, or metal to create unique and textured layers. However, ensure that your Cricut machine can cut or engrave these materials.
Q: How can I protect my shadow box from dust and damage?
A: Consider framing your shadow box with glass or acrylic to protect the contents from dust and moisture. You can also use acid-free paper and adhesives to prevent fading and discoloration.