


How to Create Stunning 3D Shadow Box Art
Introduction
3D shadow box art is a captivating form of artwork that combines the illusion of depth with the tangible beauty of layered materials. This guide will provide a comprehensive overview of the techniques and materials involved in creating these captivating pieces.
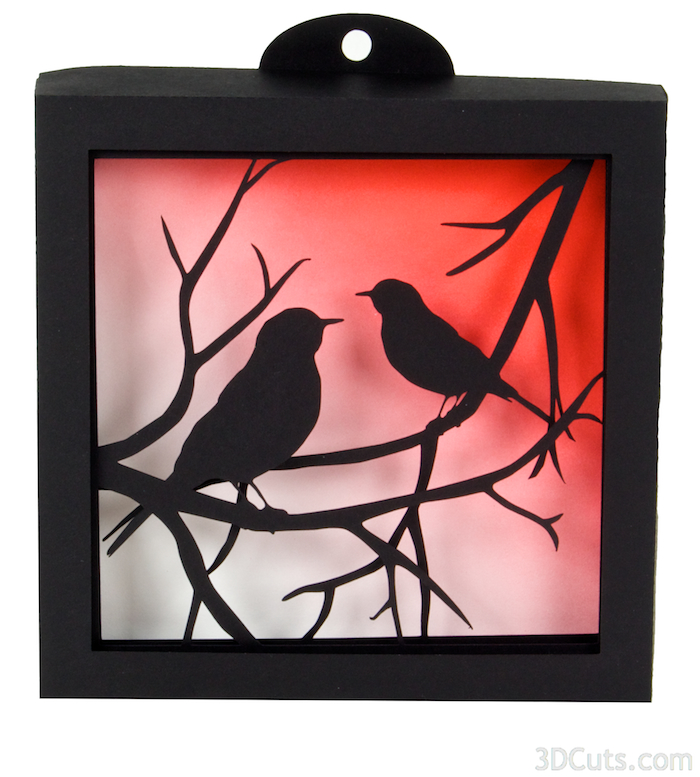

Table of Content
H1: Materials and Tools
- Shadow box frame (with glass or acrylic)
- Backing material (foam core, mat board, etc.)
- Paper or fabric for background
- Objects for layering (e.g., photos, paper cutouts, ephemera)
- Glue or adhesive
- Scissors or craft knife
- Ruler or measuring tape
- Pencil or marking tool

3D shadow box art is a captivating form of artwork that combines the illusion of depth with the tangible beauty of layered materials. This guide will provide a comprehensive overview of the techniques and materials involved in creating these captivating pieces.
- Shadow Box Svg Free Shadow Box SVG Free: Unleash Your Creativity With Limitless Designs
- Lightbox Svg For Cricut Lightbox SVG For Cricut: A Comprehensive Guide
- How To Make Shadow Box Cricut How To Make A Shadow Box Cricut: A Comprehensive Guide
- Free 3d Svg Paper Frames Shadow Box Free 3D SVG Paper Frames: Shadow Box Creations For Memorable Moments
- Free Box Templates For Cricut Free Box Templates For Cricut: Elevate Your Packaging Game
H1: Materials and Tools
Materials:

- Shadow box frame (with glass or acrylic)
- Backing material (foam core, mat board, etc.)
- T-ruler or L-square
- X-Acto knife or utility knife
- Tweezers or forceps
- Bone folder or sculpting tool
- Sandpaper or emery board
- Remove the backing material from the shadow box frame.
- Cut a piece of backing material to fit the frame.
- Attach the backing material to the frame using glue or adhesive.
- Cut a piece of paper or fabric to cover the backing material.
- Glue or adhere the background material to the backing.
- Smooth out any wrinkles or bubbles using a bone folder or sculpting tool.
- Select the objects you want to layer in your shadow box.
- Arrange the objects on the background, creating a sense of depth.
- Glue or adhere the objects to the background using appropriate adhesive.
- Use foam core, mat board, or other materials to create layers between the objects.
- Cut or shape the layers to add dimension and interest.
- Glue or adhere the layers to the background.
- Cut or tear pieces of paper or fabric into irregular shapes.
- Glue or adhere the paper or fabric to the layers to create shadows and depth.
- Consider adding additional embellishments such as beads, sequins, or glitter.
- Glue or adhere the embellishments to the shadow box as desired.
- Use contrasting colors and textures: Combine different colors and textures to create visual interest and depth.
- Experiment with lighting: Place your shadow box in different lighting conditions to see how it affects the appearance of the artwork.
- Create a focal point: Draw attention to a specific object or area by using larger or more prominent elements.
- Use negative space: Leave areas of the background empty to create a sense of balance and contrast.
- Consider the viewer’s perspective: Think about how the artwork will be viewed from different angles and adjust the layers accordingly.
Tools:


H2: Step-by-Step Instructions

1. Prepare the Shadow Box Frame
2. Create the Background
3. Layer the Objects
4. Add Depth and Dimension
5. Create Shadows
6. Add Embellishments
H3: Tips and Techniques
H4: Troubleshooting
Problem: The objects are not staying in place.
Solution: Use stronger adhesive or glue the objects directly to the layers instead of the background.
Problem: The shadows are too dark or too light.
Solution: Adjust the size, shape, or color of the paper or fabric used to create the shadows.
Problem: The artwork is too busy or cluttered.
Solution: Remove or rearrange some of the objects or layers to create a more balanced composition.
Conclusion
Creating 3D shadow box art is a rewarding and creative endeavor that can add depth and character to any space. By following the techniques and tips outlined in this guide, you can create stunning pieces that will delight both you and others.
FAQs
Q: What type of glue is best for shadow box art?
A: Acid-free glue or adhesive is recommended to prevent damage to the objects and materials.
Q: Can I use any type of object in a shadow box?
A: Yes, but choose objects that are lightweight and won’t deteriorate over time.
Q: How do I protect my shadow box art from dust and fading?
A: Use a glass or acrylic cover to protect the artwork from dust and UV rays.


