


H1: DIY Guitar Shadow Box: A Step-by-Step Guide to Displaying Your Prized Instrument
H2: Introduction
A guitar shadow box is a captivating way to showcase your beloved guitar, protecting it from dust and damage while elevating its aesthetic appeal. Whether you’re a seasoned collector or a passionate musician, crafting a guitar shadow box DIY project is a rewarding endeavor that allows you to personalize your home decor and cherish your musical instrument.

Table of Content
H2: Materials and Tools
- Shadow box frame: Choose a frame with a depth of at least 4 inches to accommodate the guitar’s body.
- Mounting board: A sturdy piece of plywood or MDF board will serve as the base for mounting the guitar.
- Guitar hanger: A specialized hanger designed to support the guitar securely within the shadow box.
- Foam padding: Soft foam or felt will protect the guitar’s finish from scratches.
- Hardware: Screws, nails, or a combination of both for mounting the guitar and securing the frame.
- Tools: Screwdriver, hammer, measuring tape, level, and utility knife.

H2: Step-by-Step Instructions

1. Prepare the Mounting Board
A guitar shadow box is a captivating way to showcase your beloved guitar, protecting it from dust and damage while elevating its aesthetic appeal. Whether you’re a seasoned collector or a passionate musician, crafting a guitar shadow box DIY project is a rewarding endeavor that allows you to personalize your home decor and cherish your musical instrument.
- Diy Papercut Light Box DIY Papercut Light Box: A Step-by-Step Guide To Illuminate Your Artwork
- A Tale Of Light And Shadow A Tale Of Light And Shadow: Unraveling The Timeless Epic Of Good And Evil
- Shadow Box Svg Free Shadow Box SVG Free: Unleash Your Creativity With Limitless Designs
- Shadow Box 3d Art Shadow Box 3D Art: A Comprehensive Guide To Creating Depth And Dimension
- Free Shadow Box Templates Free Shadow Box Templates: A Comprehensive Guide To Enhance Your Display Creations
H2: Materials and Tools
To embark on your guitar shadow box DIY journey, gather the following materials and tools:

- Shadow box frame: Choose a frame with a depth of at least 4 inches to accommodate the guitar’s body.
- Mounting board: A sturdy piece of plywood or MDF board will serve as the base for mounting the guitar.
- Measure and cut the mounting board to fit snugly inside the shadow box frame.
- Cover the board with foam padding or felt, securing it with adhesive or staples.
- Determine the optimal position for the guitar hanger on the mounting board.
- Mark and drill pilot holes for the hanger screws.
- Screw the hanger securely into place.
- Carefully place the guitar on the mounting board, aligning it with the hanger.
- Secure the guitar to the hanger using the provided screws or bolts.
- Ensure the guitar is level and stable.
- Place the mounting board with the guitar mounted inside the shadow box frame.
- Secure the frame to the mounting board using screws or nails.
- Check the alignment and make any necessary adjustments.
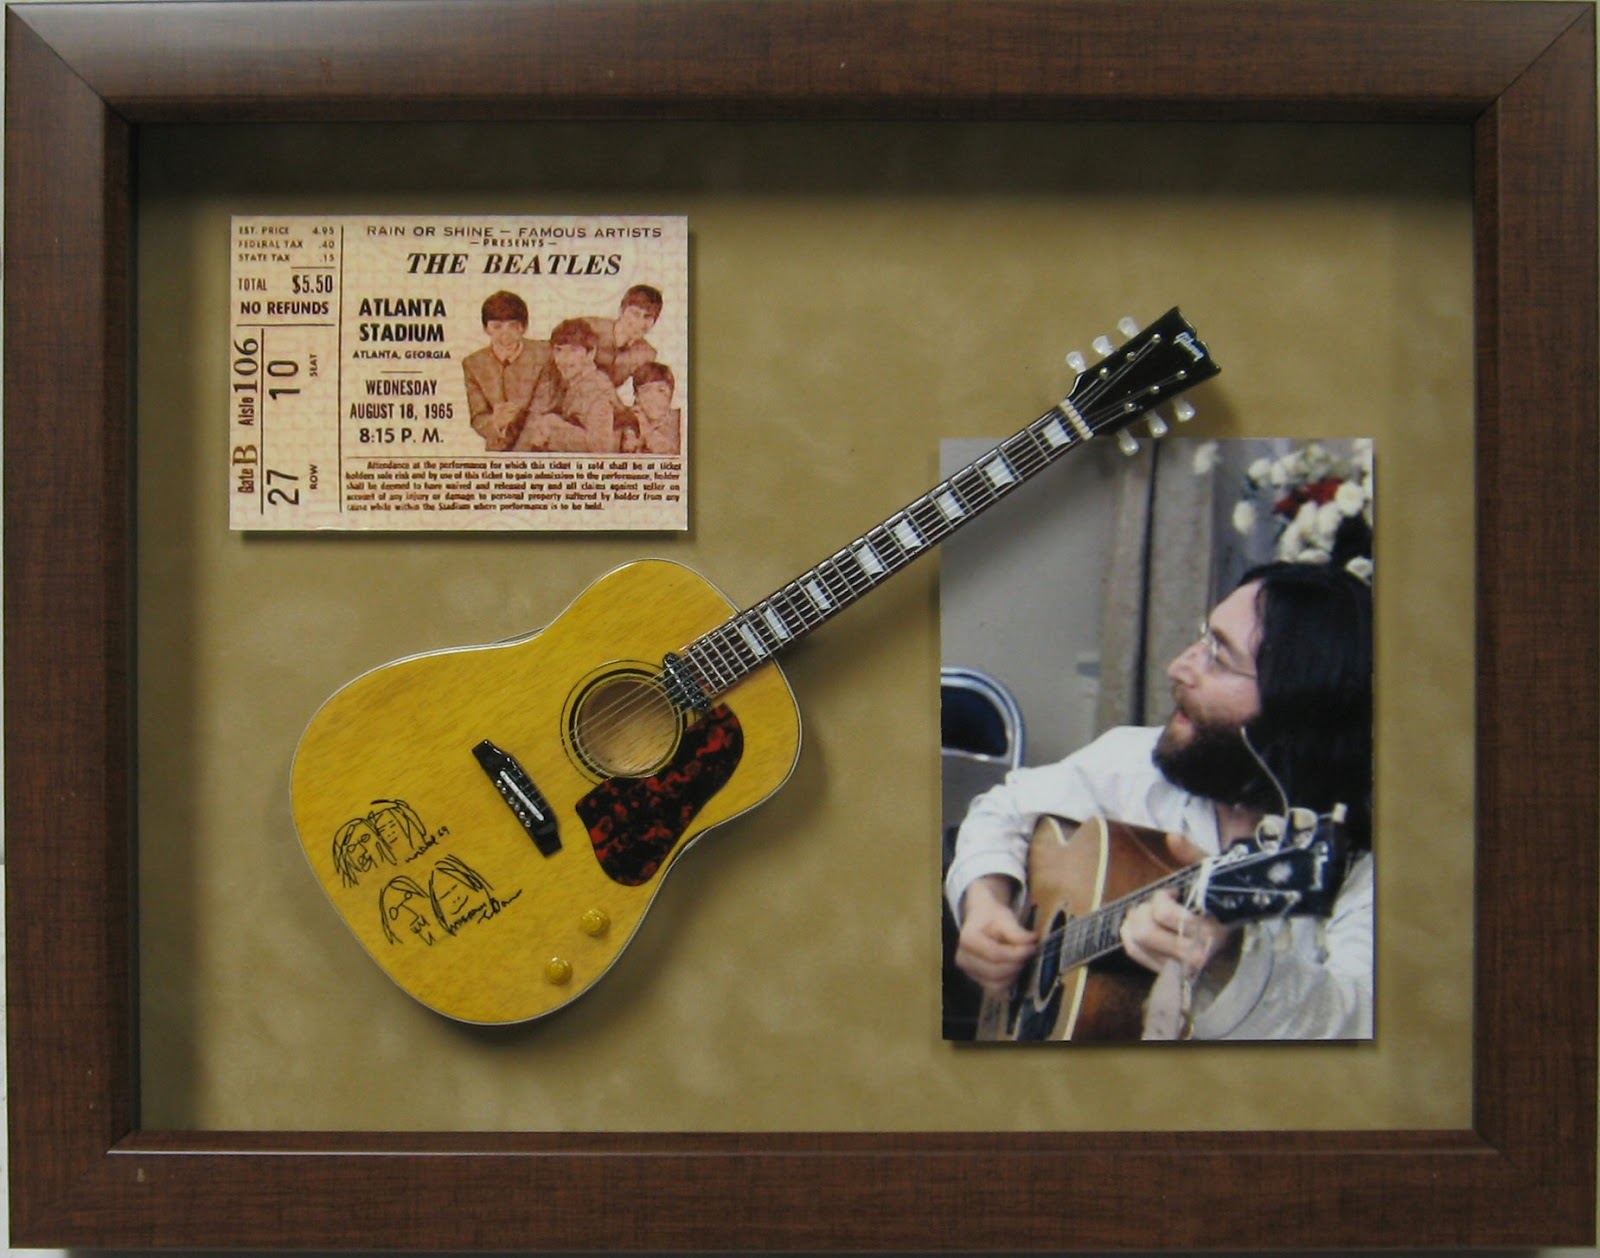
- If desired, add a background to the shadow box, such as a photograph, fabric, or decorative paper.
- Seal the frame with a clear finish or paint to protect it from damage.

2. Install the Guitar Hanger


3. Mount the Guitar

4. Assemble the Shadow Box
5. Finishing Touches
H2: Design Considerations
1. Frame Style: Choose a frame that complements the guitar’s aesthetic and the decor of your space.
2. Mounting Angle: Experiment with different angles to create a visually appealing display.
3. Lighting: Consider incorporating LED strip lights or spotlights to enhance the guitar’s visibility.
4. Background: Select a background that enhances the guitar’s beauty and personality.
H2: Conclusion
Creating a guitar shadow box DIY project is a fulfilling experience that allows you to preserve and showcase your prized instrument. By following these detailed instructions and incorporating your own creative touches, you can transform a simple shadow box into a stunning display piece that will be cherished for years to come.
H3: FAQs
Q: What is the ideal depth for a guitar shadow box frame?
A: At least 4 inches to accommodate the guitar’s body comfortably.
Q: Can I use any type of hanger to mount the guitar?
A: No, use a specialized guitar hanger designed to support the instrument securely.
Q: How do I ensure the guitar is level and stable within the shadow box?
A: Use a level to check the alignment and adjust the guitar’s position as needed.
Q: Can I add additional items to the shadow box, such as photos or memorabilia?
A: Yes, you can customize the shadow box by adding personal touches that enhance the guitar’s significance.
Q: How do I protect the guitar’s finish from scratches?
A: Cover the mounting board with soft foam padding or felt before mounting the guitar.


