


Layered Paper Shadow Box: A Guide to Creating Stunning 3D Art
Introduction
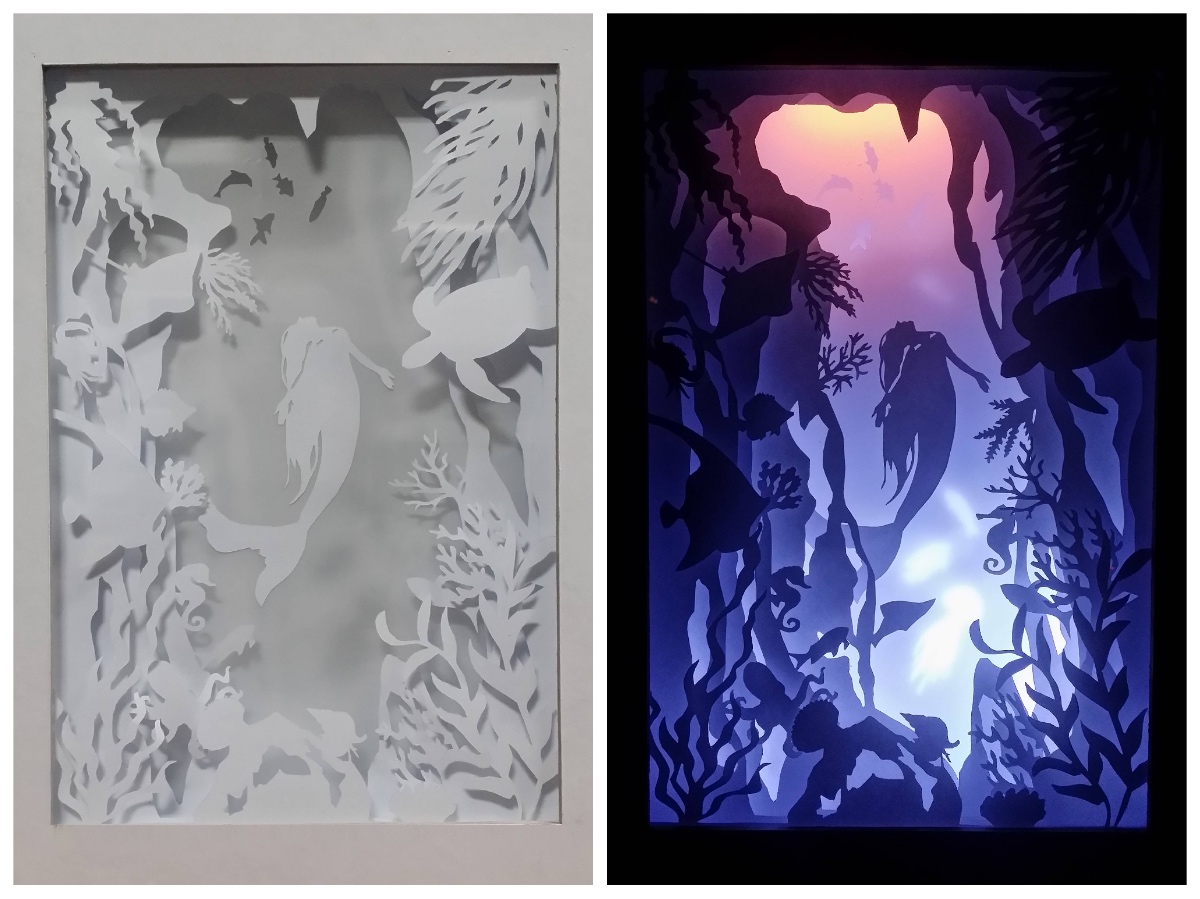
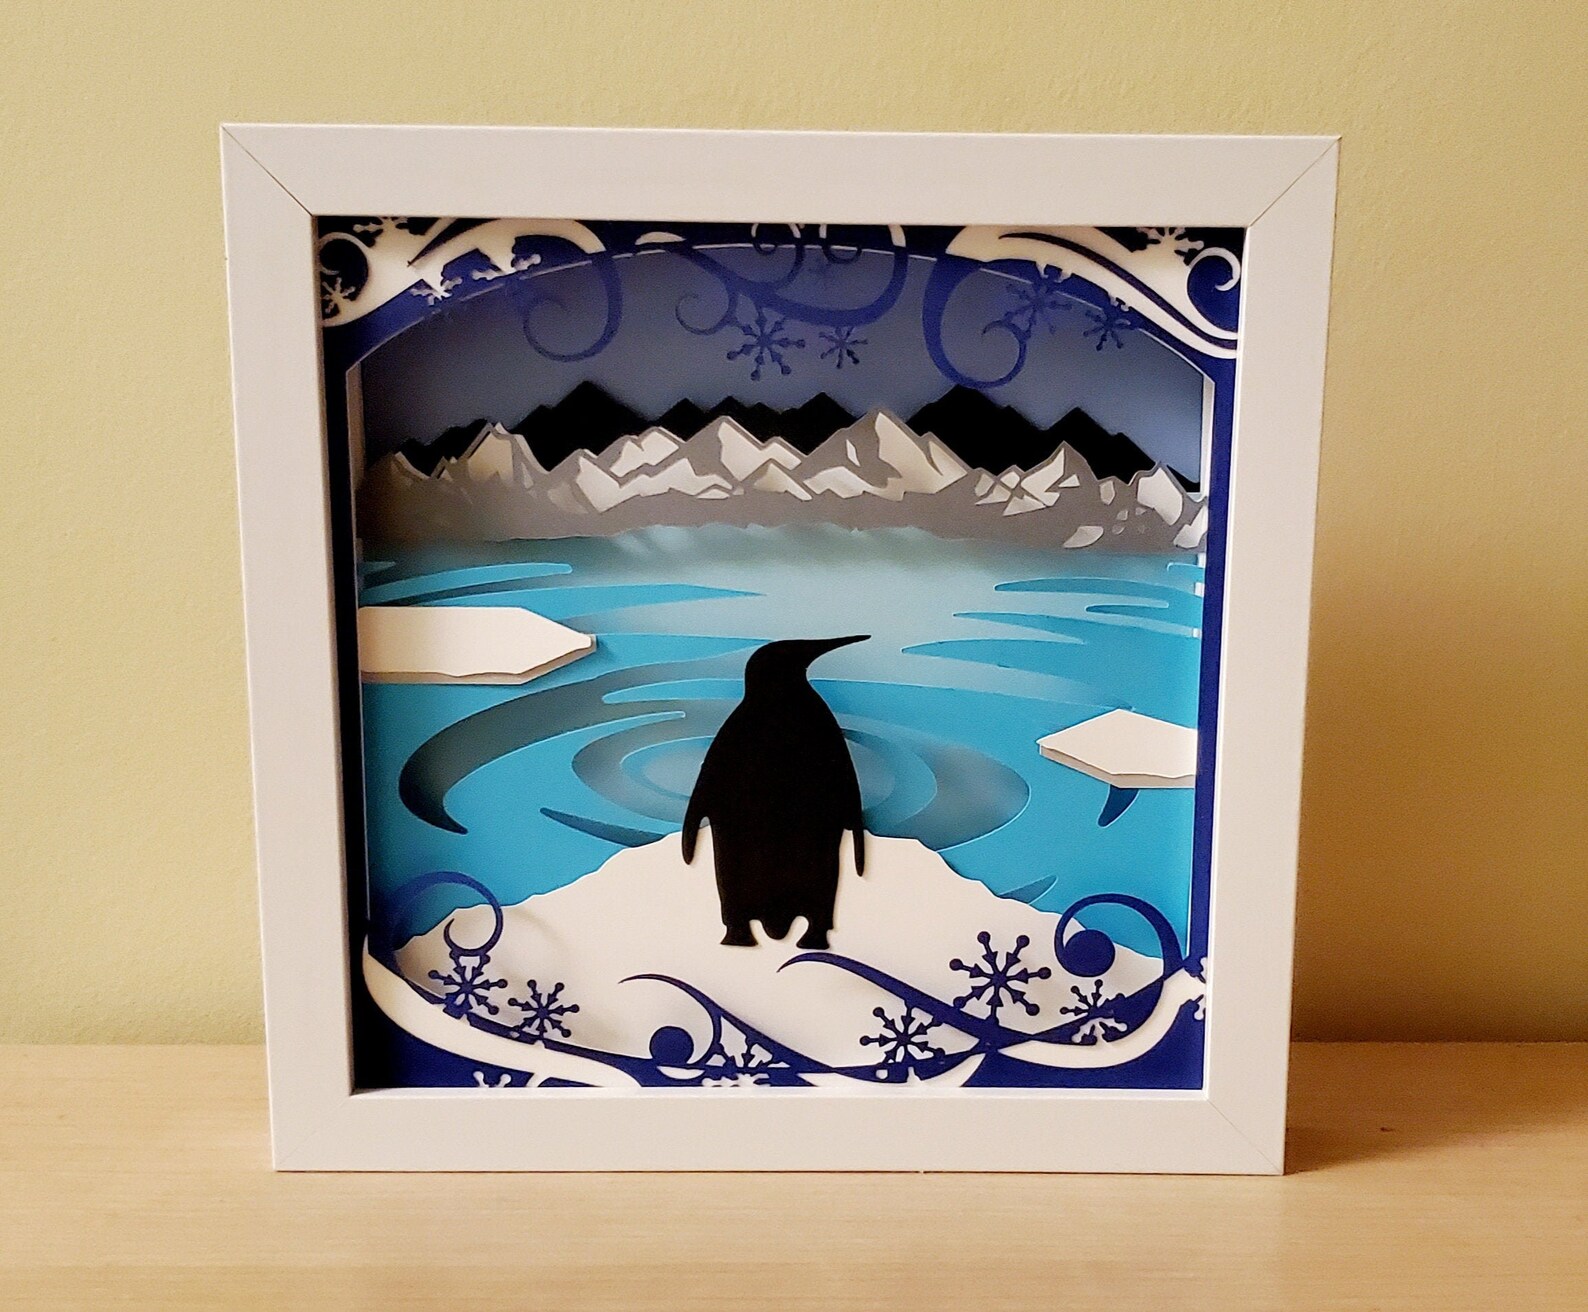
A layered paper shadow box is a captivating form of art that adds depth and dimension to any space. It involves layering and assembling intricate paper designs within a shadow box frame, creating an illusion of depth and perspective. This guide will provide comprehensive instructions on how to create your own layered paper shadow box, from choosing the right materials to assembling the final masterpiece.


Table of Content
- 1 Layered Paper Shadow Box: A Guide to Creating Stunning 3D Art
- 1.1 Introduction
- 2 Materials
- 2.2 Frame
- 3 Materials
- 3.3 Papers
- 3.4 Tools
- 4 Step-by-Step Instructions
- 4.5 1. Plan Your Design
- 4.6 2. Prepare the Background
- 4.7 3. Create the Layers
- 4.8 4. Add Embellishments
- 4.9 5. Insert the Layers into the Frame
- 4.10 6. Seal the Shadow Box
- 5 Tips for Success
- 6 Conclusion
- 7 FAQs
- 7.11 Q: What types of themes can I use for a layered paper shadow box?
- 7.12 Q: Can I use other materials besides paper?
- 7.13 Q: How can I make my shadow box more unique?
- 7.14 Q: How do I store and display my layered paper shadow box?
- 7.15 Q: Can I sell layered paper shadow boxes?
Materials
- Cardstock in various colors and textures
- Patterned paper or scrapbook paper
- Decorative paper with embellishments
Frame

- Shadow box frame with a depth of at least 1 inch
- Glass or acrylic sheet to cover the frame

A layered paper shadow box is a captivating form of art that adds depth and dimension to any space. It involves layering and assembling intricate paper designs within a shadow box frame, creating an illusion of depth and perspective. This guide will provide comprehensive instructions on how to create your own layered paper shadow box, from choosing the right materials to assembling the final masterpiece.
- 3d Shadow Box Templates 3D Shadow Box Templates: A Comprehensive Guide To Enhancing Your Creative Projects
- Free Box Svg Templates Free Box SVG Templates: A Comprehensive Guide To Designing Custom Boxes
- Christmas Shadow Box Svg Free Christmas Shadow Box SVG Free: A Festive Way To Decorate Your Home
- Printable Paper Cut Shadow Box Templates Printable Paper Cut Shadow Box Templates: A Guide To Creating Stunning 3D Artwork
- Free Cricut Shadow Box Template Free Cricut Shadow Box Template: Elevate Your Home Decor With Personalized Art
Materials
Papers

- Cardstock in various colors and textures
- Patterned paper or scrapbook paper
- Cutting mat
- Craft knife or scissors
- Ruler or measuring tape
- Glue or adhesive
- Tweezers
- Pencil or pen
- Cut the Layers: Cut out the individual shapes and designs from different types of paper according to your plan. Vary the sizes and textures to add depth.
- Assemble the Layers: Glue the layers together in the desired order, starting with the bottom layer. Use tweezers to handle small pieces and ensure precise placement.
- Prepare the Frame: Clean the glass or acrylic sheet and insert it into the frame.
- Position the Layers: Carefully place the assembled layers inside the frame, starting with the background. Secure them with glue or adhesive if necessary.
- Use Acid-Free Materials: Choose acid-free papers and adhesives to prevent discoloration or damage over time.
- Layer Strategically: Vary the sizes and textures of the layers to create depth and visual interest.
- Consider Lighting: If desired, place a small LED light inside the shadow box to enhance the illumination and shadows.
- Experiment with Textures: Experiment with different types of paper, such as embossed, metallic, or textured papers, to add tactile interest.
- Pay Attention to Detail: Take your time and pay attention to the details, such as the placement of embellishments and the alignment of the layers.
Tools


Step-by-Step Instructions
1. Plan Your Design
Determine the theme and overall design of your shadow box. Sketch out a rough layout on paper to visualize the placement and layers of the different elements.
2. Prepare the Background
Cut a piece of cardstock or patterned paper to fit the back of the shadow box. This will serve as the backdrop for your design.
3. Create the Layers
4. Add Embellishments
Embellish the layers with additional decorative elements such as stickers, beads, sequins, or ribbons. This adds visual interest and enhances the 3D effect.
5. Insert the Layers into the Frame
6. Seal the Shadow Box
Close the shadow box with the remaining backboard. Make sure the glass or acrylic sheet is clean and free of fingerprints.
Tips for Success
Conclusion
Creating a layered paper shadow box is a rewarding and creative endeavor. By following these step-by-step instructions and incorporating the tips provided, you can create stunning 3D art that will add depth, dimension, and personality to any space. Whether you’re a seasoned crafter or a beginner looking for a new hobby, this guide will empower you to explore your creativity and create unique and captivating works of art.
FAQs
Q: What types of themes can I use for a layered paper shadow box?
A: The theme is entirely up to your imagination. Popular themes include landscapes, nature scenes, abstract designs, quotes, or personal memories.
Q: Can I use other materials besides paper?
A: Yes, you can incorporate other materials such as fabric, foam, or thin metal sheets to add texture and dimension.
Q: How can I make my shadow box more unique?
A: Experiment with different techniques, such as embossing, die-cutting, or quilling, to create unique and personalized designs.
Q: How do I store and display my layered paper shadow box?
A: Store your shadow box in a dry and dust-free environment. Display it on a wall, shelf, or tabletop where it can be admired.
Q: Can I sell layered paper shadow boxes?
A: Yes, you can sell your creations online or at local craft fairs. However, be sure to use original designs and consider copyright laws.


