


H1: Memorial Shadow Box Cricut: A Cherished Way to Honor Loved Ones
H2: Introduction
A memorial shadow box is a heartfelt tribute to a cherished loved one, preserving precious mementos and memories in a tangible and meaningful way. With the advent of Cricut cutting machines, creating a personalized shadow box has become more accessible than ever. This comprehensive guide will delve into the art of crafting a Memorial Shadow Box Cricut, providing step-by-step instructions, design inspiration, and tips for creating a lasting and poignant keepsake.
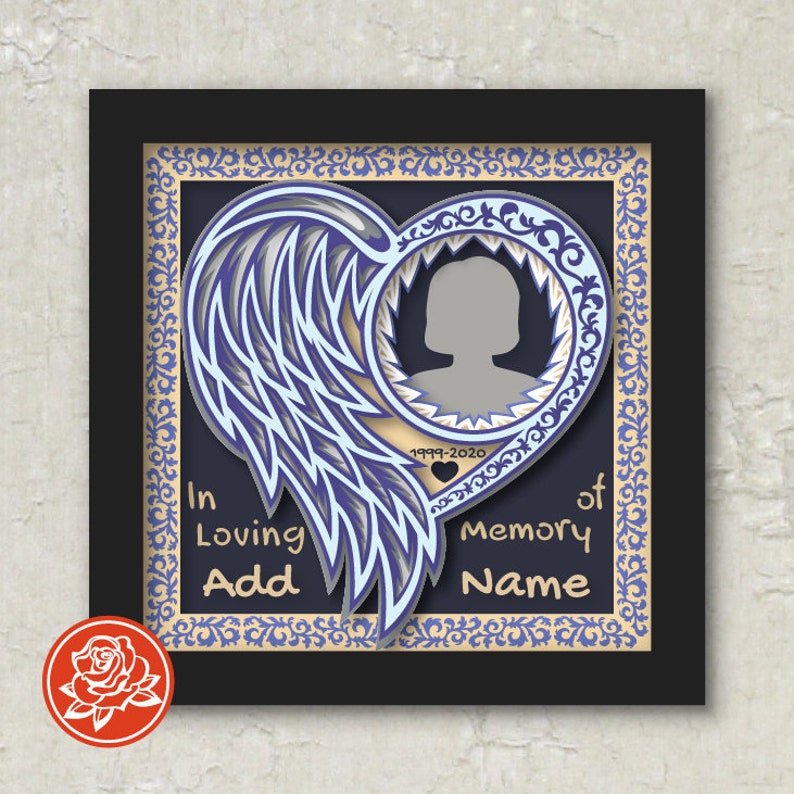

Table of Content
H2: Materials and Tools
- Shadow box frame
- Cardstock or scrapbook paper
- Photos or other mementos
- Embellishments (optional)
- Acid-free glue or adhesive

Tools:
- Cricut cutting machine
- Free Svg Shadow Box Free SVG Shadow Box: A Comprehensive Guide To Creating Stunning 3D Papercraft
- 3D Svg Shadow Box 3D SVG Shadow Box: A Comprehensive Guide To Creating Stunning Visual Effects
- Light Up Shadow Box Cricut H1: Illuminate Your Memories With The Light Up Shadow Box Cricut
- Free Shadow Box Frame Svg File Free Shadow Box Frame SVG File: A Step-by-Step Guide To Creating Custom Frames
- Free Shadow Box Template For Cricut Free Shadow Box Template For Cricut: Elevate Your Crafting Projects
- Shadow box frame
- Cardstock or scrapbook paper
- Cutting mat
- Weeding tool
- Ruler or measuring tape
- Pencil or pen
- Choose a cardstock or scrapbook paper that complements the shadow box frame and the mementos you’ll be displaying.
- Use your Cricut machine to cut a base layer that fits the back of the shadow box.
- For a more intricate design, consider using patterned paper or creating a layered effect with multiple pieces of cardstock.
- Arrange the photos and mementos within the shadow box, considering the size, shape, and placement.
- Use acid-free glue or adhesive to secure the items to the base layer.
- For larger or heavier mementos, consider using foam core or other materials to create a raised effect.
- Enhance the shadow box with personalized embellishments, such as cutouts of names, dates, or meaningful symbols.
- Use your Cricut machine to cut these embellishments from cardstock or vinyl.
- Add color and texture to the embellishments by using different materials or layering them.
- Once the embellishments are complete, assemble the shadow box by placing the base layer with the mementos inside the frame.
- Secure the backing of the frame to hold everything in place.
- Consider using glass or acrylic to protect the contents of the shadow box from dust and damage.
- Incorporate symbols of love, remembrance, and hope, such as hearts, stars, or wings.
- Use quotes or phrases that hold special meaning to the deceased or their loved ones.
- Draw inspiration from nature by using floral patterns, leaf cutouts, or animal silhouettes.
- Incorporate symbolic elements, such as butterflies representing transformation or doves representing peace.
- Include handwritten notes, favorite poems, or special messages to create a truly unique and meaningful tribute.
- Use cutouts of the deceased’s handwriting or a silhouette of their profile to personalize the shadow box.
- Use acid-free materials to prevent damage to the mementos over time.
- Consider using archival-quality photos and documents to ensure their longevity.
- Keep the shadow box away from direct sunlight and humidity to prevent fading or warping.
- Clean the glass or acrylic regularly to maintain its clarity and protect the contents.
A memorial shadow box is a heartfelt tribute to a cherished loved one, preserving precious mementos and memories in a tangible and meaningful way. With the advent of Cricut cutting machines, creating a personalized shadow box has become more accessible than ever. This comprehensive guide will delve into the art of crafting a Memorial Shadow Box Cricut, providing step-by-step instructions, design inspiration, and tips for creating a lasting and poignant keepsake.
H2: Materials and Tools
Materials:


H2: Step-by-Step Instructions

Step 1: Design and Cut the Base

Step 2: Add Photos and Mementos

Step 3: Design and Cut Embellishments
Step 4: Assemble the Shadow Box
H2: Design Inspiration
Sentimental Themes:
Nature and Symbolism:
Personalized Touches:
H2: Tips for Creating a Lasting Keepsake
H2: Conclusion
Creating a Memorial Shadow Box Cricut is a heartfelt and rewarding way to honor and remember loved ones. By following the step-by-step instructions, using creative design inspiration, and incorporating personalized touches, you can create a lasting and cherished keepsake that will bring comfort and solace for years to come.
H2: FAQs
Q: What size shadow box should I choose?
A: The size of the shadow box will depend on the number and size of the mementos you wish to display. Consider choosing a box that is slightly larger than the largest item.
Q: Can I use any type of cardstock or scrapbook paper?
A: For best results, use acid-free cardstock or scrapbook paper to prevent damage to the mementos over time.
Q: How can I preserve handwritten notes or documents?
A: To preserve handwritten notes or documents, consider laminating them or placing them in a protective sleeve before adding them to the shadow box.
Q: What other embellishments can I use besides cutouts?
A: Other embellishments that can enhance a Memorial Shadow Box Cricut include ribbons, buttons, beads, or dried flowers.


