


Download Wedding Shadow Box Ideas Cricut: Preserving Memories in Style
Introduction
Wedding shadow boxes are a beautiful and unique way to display and preserve precious memories from your special day. With the versatility of a Cricut cutting machine, you can create custom shadow boxes that are truly one-of-a-kind. This article will provide a comprehensive guide to downloading wedding shadow box ideas from Cricut, including tips on choosing the right design, cutting the materials, and assembling the box.
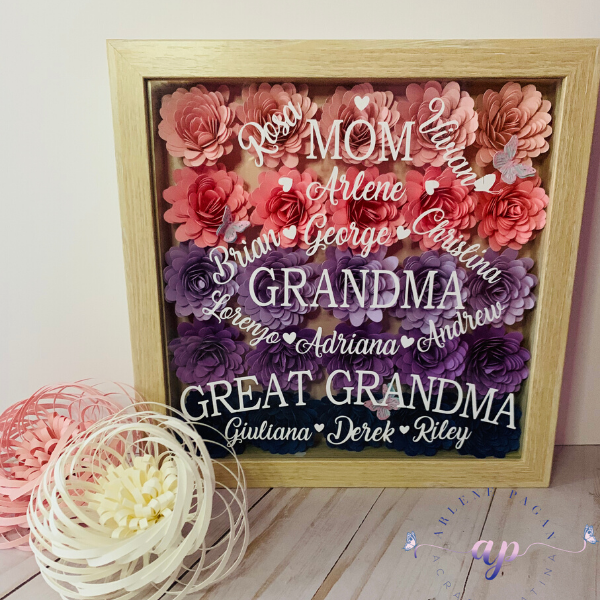

Table of Content
- 1 Download Wedding Shadow Box Ideas Cricut: Preserving Memories in Style
- 1.1 Introduction
- 1.2 H1: Choosing the Perfect Wedding Shadow Box Idea
- 1.2.1 H2: Decide on the Size and Shape
- 1.2.2 H2: Select the Materials
- 1.3 H2: Downloading the Cricut Design
- 1.4 H1: Cutting the Materials
- 1.4.3 H2: Prepare the Materials
- 1.5 H1: Choosing the Perfect Wedding Shadow Box Idea
- 1.5.4 H2: Consider Your Style and Theme
- 1.5.5 H2: Decide on the Size and Shape
- 1.5.6 H2: Load the Materials into the Cricut Machine
- 1.6 H1: Assembling the Wedding Shadow Box
- 1.6.7 H2: Create the Base
- 1.6.8 H2: Add the Background
- 1.6.9 H2: Arrange the Contents
- 1.6.10 H2: Add the Front
- 1.7 H1: Finishing Touches
- 1.7.11 H2: Personalize the Shadow Box
- 1.7.12 H2: Display the Shadow Box
- 1.8 Conclusion
- 1.9 FAQs
H1: Choosing the Perfect Wedding Shadow Box Idea
The first step in creating a wedding shadow box is choosing a design that reflects your style and the theme of your wedding. Cricut Design Space offers a wide range of templates and images specifically designed for wedding shadow boxes. You can browse categories such as "Wedding," "Rustic," "Modern," and "Vintage" to find a design that suits your taste.
H2: Decide on the Size and Shape
Wedding shadow boxes come in various sizes and shapes. Consider the amount of items you want to display and the space you have available. Common shapes include square, rectangular, and heart-shaped.
H2: Select the Materials
Cricut shadow boxes are typically made from wood, cardstock, or acrylic. Wood is a classic choice that adds a touch of elegance, while cardstock is more affordable and allows for intricate designs. Acrylic is a modern and durable option that provides a clear view of the contents.
H2: Downloading the Cricut Design

Once you have selected a design, download it from Cricut Design Space. You can purchase premium designs or use free designs available in the library. Be sure to choose a design that is compatible with your Cricut machine.
H1: Cutting the Materials
H2: Prepare the Materials

Gather the necessary materials, including cardstock, wood, or acrylic. Cut the materials to the desired size using a cutting machine or scissors.
Wedding shadow boxes are a beautiful and unique way to display and preserve precious memories from your special day. With the versatility of a Cricut cutting machine, you can create custom shadow boxes that are truly one-of-a-kind. This article will provide a comprehensive guide to downloading wedding shadow box ideas from Cricut, including tips on choosing the right design, cutting the materials, and assembling the box.
- Download Free Paper Cutting Patterns Pdf Download Free Paper Cutting Patterns PDF: A Comprehensive Guide To Intricate Designs
- Download Plantillas Cricut Gratis Download Plantillas Cricut Gratis: A Comprehensive Guide To Unleashing Your Creativity
- Lighted Shadow Box Ideas Lighted Shadow Boxes: Illuminating Your Cherished Memories
- Download Layered Paper Art Svg Free Download Layered Paper Art SVG Free: Unleash Your Creativity With Intricate Designs
- Shadow Box Templates Shadow Box Templates: A Comprehensive Guide To Creating Stunning Displays
H1: Choosing the Perfect Wedding Shadow Box Idea
H2: Consider Your Style and Theme

The first step in creating a wedding shadow box is choosing a design that reflects your style and the theme of your wedding. Cricut Design Space offers a wide range of templates and images specifically designed for wedding shadow boxes. You can browse categories such as "Wedding," "Rustic," "Modern," and "Vintage" to find a design that suits your taste.
H2: Decide on the Size and Shape
Wedding shadow boxes come in various sizes and shapes. Consider the amount of items you want to display and the space you have available. Common shapes include square, rectangular, and heart-shaped.
H2: Load the Materials into the Cricut Machine

Place the materials onto the cutting mat and load them into the Cricut machine. Follow the on-screen instructions to cut the materials according to the design.
H1: Assembling the Wedding Shadow Box
H2: Create the Base

If using wood or acrylic, assemble the base of the shadow box by gluing or nailing the sides together. If using cardstock, fold the sides along the scored lines and glue them together.
H2: Add the Background

Cut a piece of cardstock or fabric to fit the back of the shadow box. Glue or tape it into place.
H2: Arrange the Contents
Carefully arrange the wedding memorabilia inside the shadow box. Use glue, tape, or foam squares to secure the items.

H2: Add the Front
Cut a piece of glass, acrylic, or acetate to fit the front of the shadow box. Glue or tape it into place.
H1: Finishing Touches
H2: Personalize the Shadow Box

Add personal touches to the shadow box, such as a monogram, wedding date, or special message. You can use vinyl, stickers, or paint to create these details.
H2: Display the Shadow Box
Find a suitable location to display your wedding shadow box. Hang it on a wall, place it on a shelf, or use it as a tabletop centerpiece.
Conclusion
Creating a wedding shadow box with a Cricut cutting machine is a rewarding experience that allows you to preserve and display your precious memories in a unique and stylish way. By following the steps outlined in this article, you can download the perfect design, cut the materials with precision, and assemble a beautiful shadow box that will be cherished for years to come.
FAQs
Q: What is the best material for a wedding shadow box?
A: Wood, cardstock, and acrylic are all suitable materials for wedding shadow boxes. Wood is classic and elegant, cardstock is affordable and versatile, and acrylic is modern and durable.
Q: How do I choose the right size and shape for my shadow box?
A: Consider the amount of items you want to display and the space you have available. Common shapes include square, rectangular, and heart-shaped.
Q: Can I use my own designs for a shadow box?
A: Yes, you can upload your own designs to Cricut Design Space and use them to create a custom shadow box.
Q: How do I preserve the contents of my shadow box?
A: Use acid-free materials and avoid exposing the contents to direct sunlight or extreme temperatures. You can also use a UV-resistant sealant to protect the items from fading.
Q: Where can I find inspiration for wedding shadow box ideas?
A: Cricut Design Space offers a wide range of templates and images specifically designed for wedding shadow boxes. You can also search for inspiration on Pinterest, Instagram, or other online platforms.


