Cricut Shadowbox: A Comprehensive Guide to Crafting 3D Masterpieces
Introduction
Cricut shadowboxes are a captivating way to preserve memories, showcase collectibles, and add depth to home décor. With the versatility of a Cricut cutting machine, you can unleash your creativity and craft stunning 3D shadowboxes that will elevate any space. This comprehensive guide will delve into the art of Cricut shadowbox making, providing step-by-step instructions, design tips, and troubleshooting techniques.


Table of Content
- 1 Cricut Shadowbox: A Comprehensive Guide to Crafting 3D Masterpieces
- 1.1 Introduction
- 2 Chapter 1: Getting Started
- 2.2 Choosing a Shadowbox Frame
- 3 Chapter 1: Getting Started
- 3.3 Materials and Tools
- 4 Chapter 2: Designing Your Shadowbox
- 4.4 Layering and Dimension
- 4.5 Cut Files and Templates
- 5 Chapter 3: Assembling Your Shadowbox
- 5.6 Preparing the Shadowbox
- 5.7 Layer and Adhere
- 5.8 Embellishing and Finishing
- 6 Chapter 4: Troubleshooting Common Issues
- 6.9 Layers Not Fitting Properly
- 6.10 Elements Falling Off
- 7 Chapter 5: Design Inspiration
- 7.11 Shadowbox Ideas
- 7.12 Cricut Design Space Gallery
- 8 Conclusion
- 9 Frequently Asked Questions
Chapter 1: Getting Started
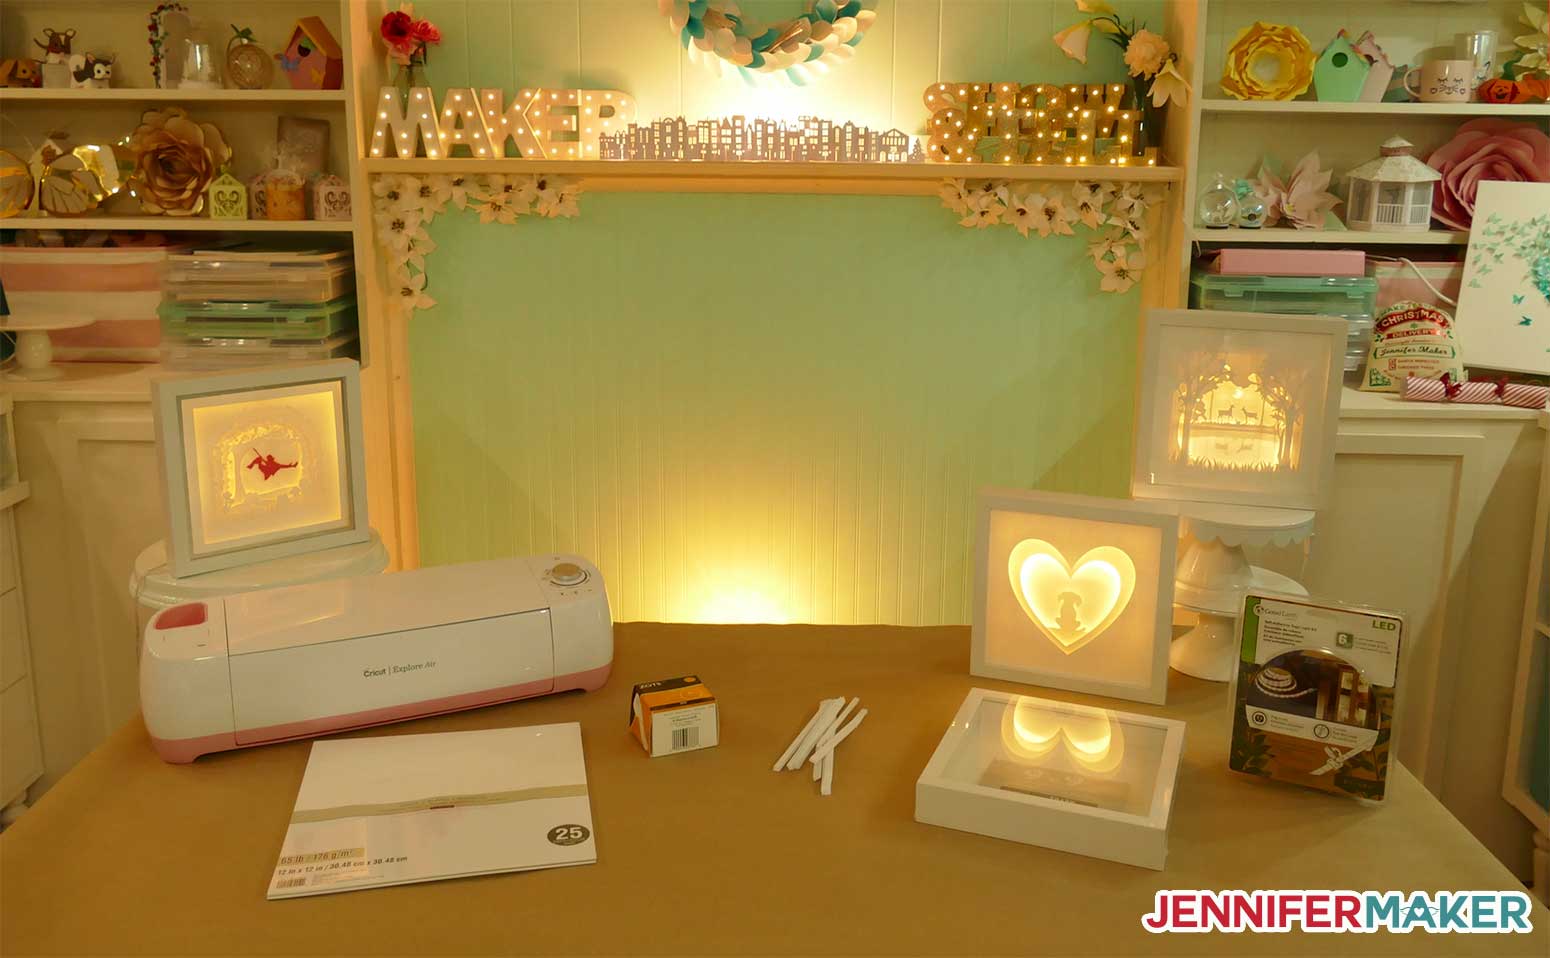
- Cricut cutting machine
- Shadowbox frame
- Cardstock or chipboard
- Adhesive (e.g., glue, double-sided tape)
- Embellishments (e.g., ribbon, buttons, sequins)

Choosing a Shadowbox Frame
- Consider the size and shape of your project.
- Svg Box Shadow SVG Box Shadow: Enhancing Visual Depth And Dimensionality
- Best Friend Shadow Box SVG Files Best Friend Shadow Box SVG Files: A Cherished Keepsake For Enduring Bonds
- Cardstock Shadow Box Cricut SVG Files Cardstock Shadow Box Cricut SVG Files: A Comprehensive Guide
- Svg Shadow Box SVG Shadow Boxes: A Comprehensive Guide To Creation And Optimization
- Download How To Make Shadow Box With Cricut H1: Crafting A Captivating Shadow Box With Cricut: A Comprehensive Guide
- Cricut cutting machine
- Shadowbox frame
- Opt for a frame with a deep shadow to create a noticeable 3D effect.
- Choose a frame that complements the style of your décor.
- Plan the layers of your shadowbox carefully to create depth and interest.
- Use different thicknesses of cardstock or chipboard to add dimension.
- Layer elements from the back to the front, with the most important elements in the foreground.
- Use pre-designed cut files or create your own using Cricut Design Space.
- Optimize your designs for intricate cuts and precise layering.
- Consider using a variety of materials to add texture and interest.
- Cut a piece of cardstock or chipboard to fit the back of the shadowbox.
- Adhere the backing to the frame using glue or double-sided tape.
- Arrange your cut elements on the backing, starting with the back layer.
- Secure each layer with adhesive, ensuring it is level and aligned.
- Use foam tape or spacers to add height and dimension.
- Add embellishments to enhance the visual appeal of your shadowbox.
- Use ribbon, buttons, or sequins to create accents and details.
- Place the glass or acrylic front on the frame and secure it with clips or screws.
- Ensure your cut files are sized correctly and scaled to fit the shadowbox.
- Double-check the alignment of your layers before adhering them.
- Use a ruler or measuring tape to ensure accuracy.
- Use strong adhesive to secure your layers and embellishments.
- Double-sided tape or foam tape provides extra hold.
- Avoid overloading the shadowbox with heavy elements.
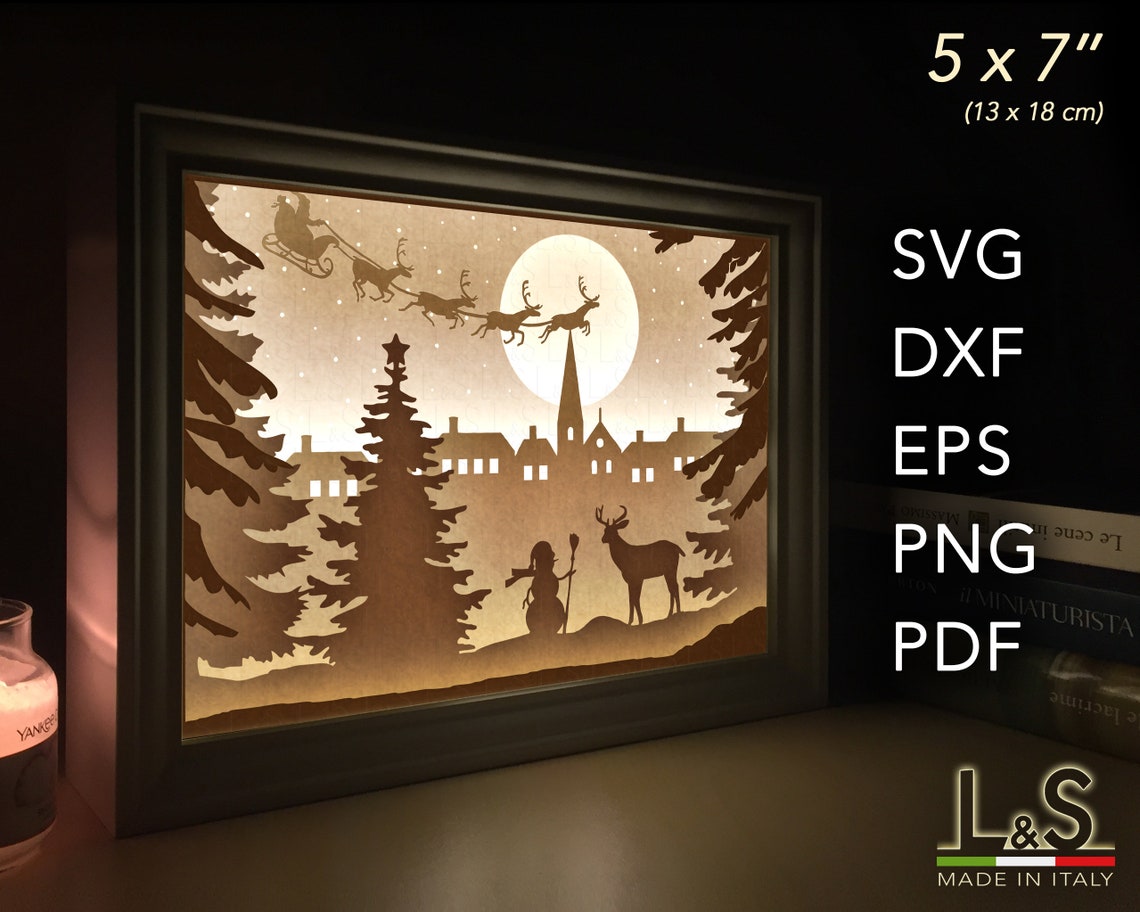
- Preserve travel memories with photos and souvenirs.
- Create a personalized display for family photos or artwork.
- Showcase a collection of stamps, coins, or other collectibles.
- Add a touch of nature to your home with a botanical shadowbox.
- Explore a vast library of pre-designed cut files and templates.
- Find inspiration from other crafters and get ideas for your own projects.
- Utilize the filtering options to narrow down your search and find the perfect designs.

Cricut shadowboxes are a captivating way to preserve memories, showcase collectibles, and add depth to home décor. With the versatility of a Cricut cutting machine, you can unleash your creativity and craft stunning 3D shadowboxes that will elevate any space. This comprehensive guide will delve into the art of Cricut shadowbox making, providing step-by-step instructions, design tips, and troubleshooting techniques.
Chapter 1: Getting Started
Materials and Tools
Chapter 2: Designing Your Shadowbox

Layering and Dimension


Cut Files and Templates

Chapter 3: Assembling Your Shadowbox
Preparing the Shadowbox
Layer and Adhere
Embellishing and Finishing
Chapter 4: Troubleshooting Common Issues
Layers Not Fitting Properly
Elements Falling Off
Chapter 5: Design Inspiration
Shadowbox Ideas
Cricut Design Space Gallery
Conclusion
Cricut shadowboxes are a limitless medium for expressing your creativity and preserving memories. By following the techniques outlined in this guide, you can craft stunning 3D shadowboxes that will become cherished keepsakes or enhance the décor of any space. Remember to experiment with different designs, materials, and embellishments to create unique and personalized masterpieces.
Frequently Asked Questions
Q: What is the best type of cardstock to use for Cricut shadowboxes?
A: Heavy cardstock or chipboard provides a sturdy base and allows for precise cuts.
Q: How do I add depth to my shadowbox?
A: Use multiple layers of cardstock or chipboard, and add spacers or foam tape to create height and dimension.
Q: Can I use any type of embellishments in my shadowbox?
A: Yes, but avoid using heavy or bulky embellishments that could weigh down the layers or damage the glass front.