


Cut Paper Shadow Box: A Guide to Creating Stunning 3D Art
Introduction
Cut paper shadow boxes are a captivating art form that combines the beauty of paper cutting with the depth and dimension of a shadow box. This unique technique allows artists to create intricate and visually striking scenes that come to life when illuminated. In this comprehensive guide, we will delve into the fascinating world of cut paper shadow boxes, exploring the history, techniques, and materials used in their creation.


Table of Content
- 1 Cut Paper Shadow Box: A Guide to Creating Stunning 3D Art
- 1.1 Introduction
- 1.2 History of Cut Paper Shadow Boxes
- 1.3 Techniques for Creating Cut Paper Shadow Boxes
- 1.3.1 1. Paper Cutting
- 1.3.2 2. Layering
- 1.3.3 3. Illumination
- 1.4 Materials for Cut Paper Shadow Boxes
- 1.5 History of Cut Paper Shadow Boxes
- 1.6 Techniques for Creating Cut Paper Shadow Boxes
- 1.6.4 1. Paper Cutting
- 1.6.5 1. Paper
- 1.6.6 2. Shadow Box
- 1.6.7 3. Backing
- 1.6.8 4. Lighting
- 1.7 Inspiration and Design Considerations
- 1.7.9 1. Subject Matter
- 1.7.10 2. Color and Texture
- 1.7.11 3. Depth and Perspective
- 1.8 Conclusion
- 1.9 Frequently Asked Questions
- 1.9.12 1. What is the best type of paper to use for cut paper shadow boxes?
- 1.9.13 2. How do I illuminate my shadow box?
- 1.9.14 3. How do I prevent the cut paper from warping?
- 1.9.15 4. Can I sell my cut paper shadow boxes?
- 1.9.16 5. What are some tips for beginners?
History of Cut Paper Shadow Boxes
Techniques for Creating Cut Paper Shadow Boxes
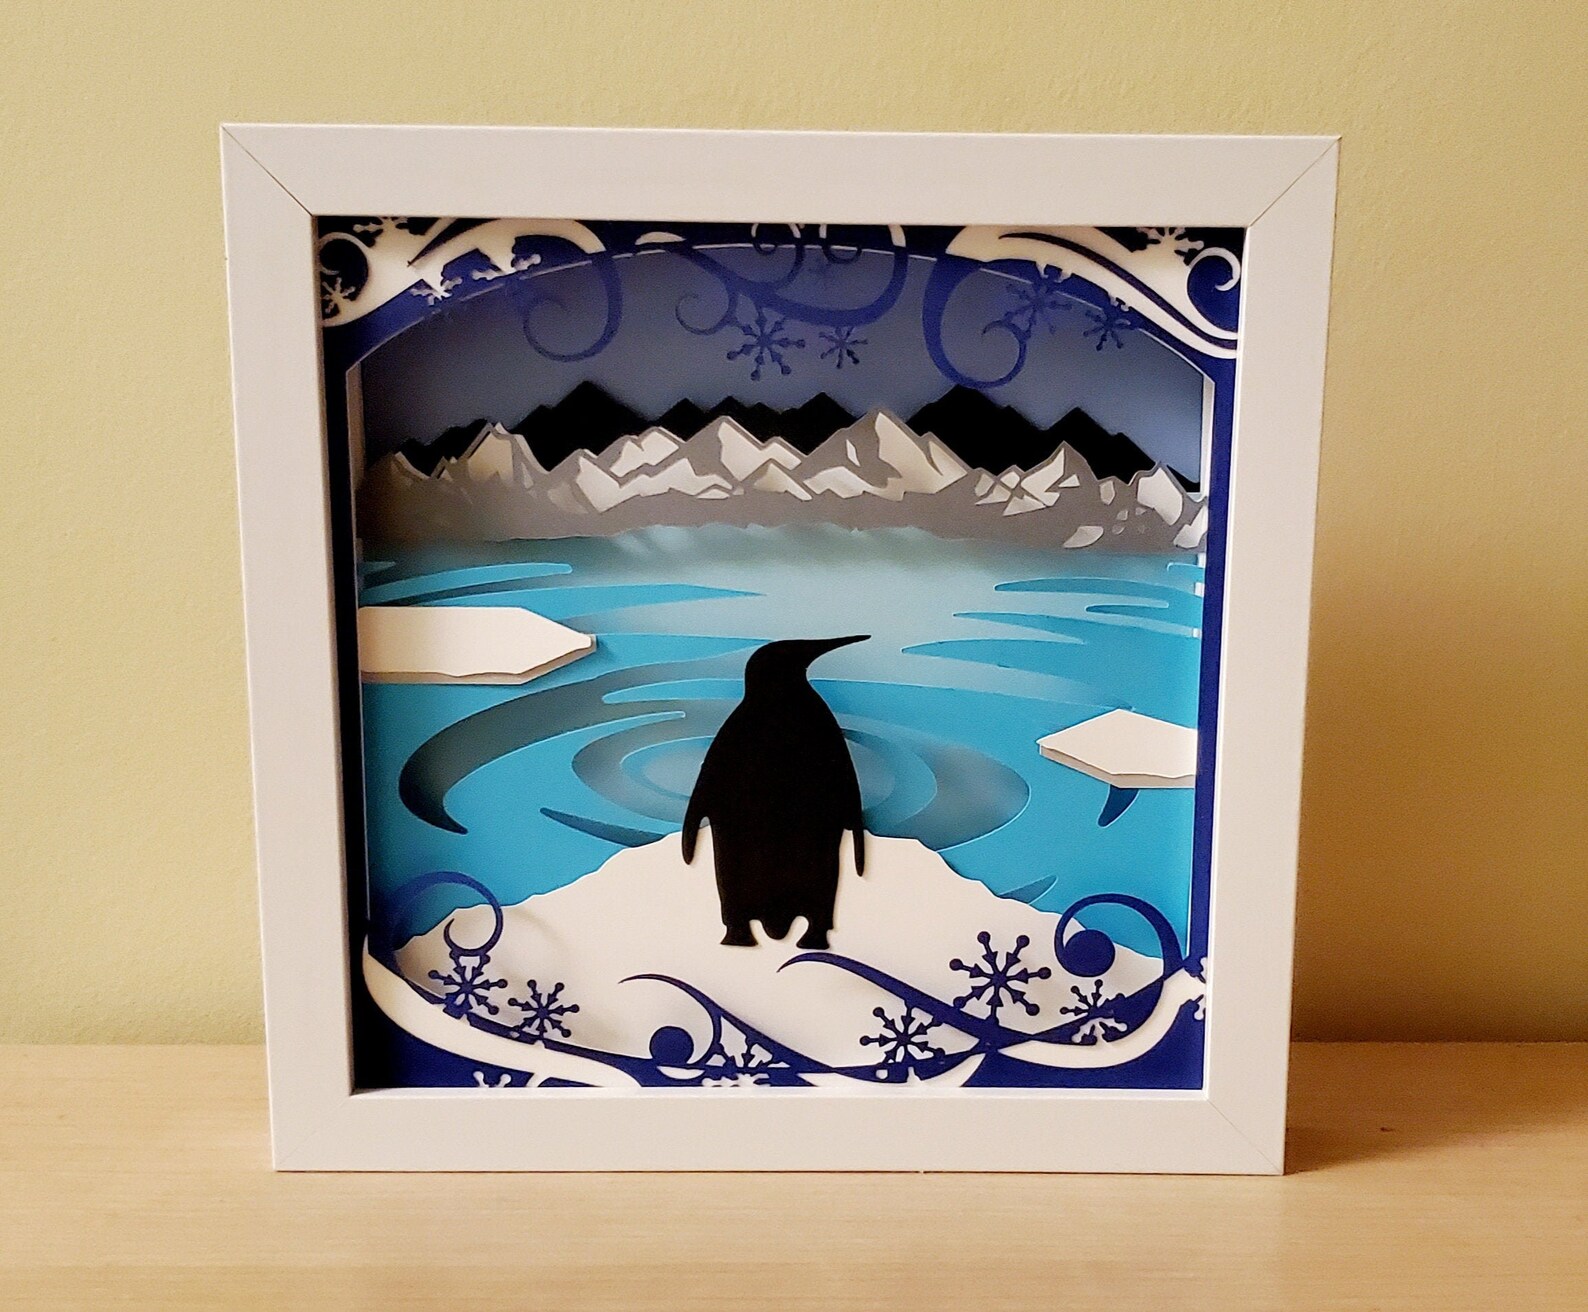
Creating a cut paper shadow box involves several key techniques:
1. Paper Cutting
The first step is to cut out the desired design from a sheet of paper. This can be done using a variety of tools, including scissors, scalpels, or craft knives. The intricate patterns and details are carefully cut out, creating a silhouette of the scene.
2. Layering
Once the paper has been cut, it is layered within the shadow box. The layers are stacked one on top of the other, creating depth and dimension. Each layer can be a different color or texture, adding to the visual appeal of the box.
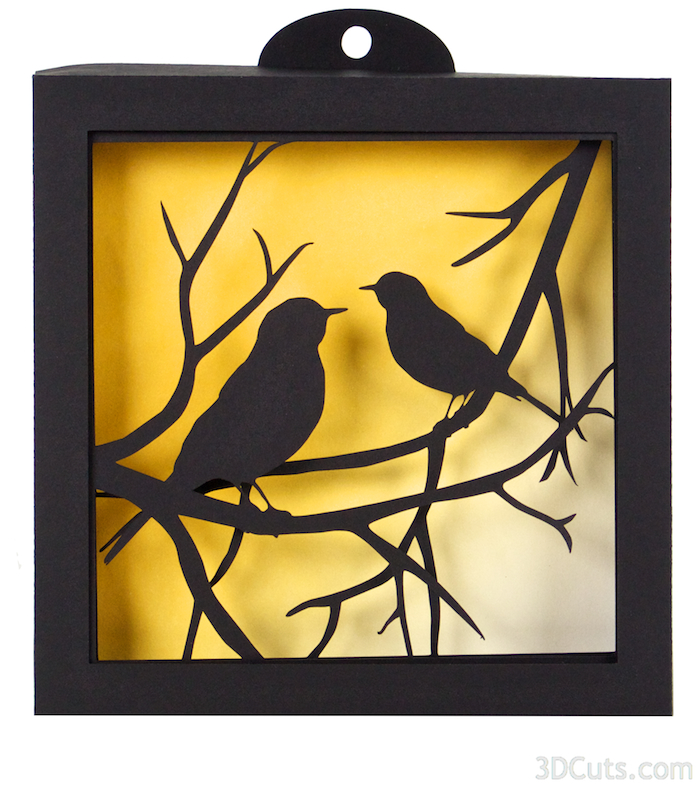
3. Illumination
The final step is to illuminate the shadow box. This can be done using a variety of light sources, such as natural light, artificial light, or LED strips. The illumination highlights the intricate details of the cut paper and creates a captivating play of shadows.
Materials for Cut Paper Shadow Boxes

The materials used in cut paper shadow boxes are essential for creating a successful piece of art. The following are the most common materials:
Cut paper shadow boxes are a captivating art form that combines the beauty of paper cutting with the depth and dimension of a shadow box. This unique technique allows artists to create intricate and visually striking scenes that come to life when illuminated. In this comprehensive guide, we will delve into the fascinating world of cut paper shadow boxes, exploring the history, techniques, and materials used in their creation.
- Free Shadow Box Svg Free Shadow Box SVG: Elevate Your Papercrafting With Stunning 3D Designs
- 3d Shadow Box Templates Free 3D Shadow Box Templates Free: Unleash Your Creativity With Stunning Shadow Art
- Free Shadow Box Card Paper Light Box Template Free Shadow Box Card Paper Light Box Template: A Comprehensive Guide
- Printable 3d Paper Cut Light Box Template Printable 3D Paper Cut Light Box Template: Illuminate Your Creations With Light And Shadow
- Printable Shadow Box Template Printable Shadow Box Template: A Comprehensive Guide To Creating Unique And Memorable Displays
History of Cut Paper Shadow Boxes
The origins of cut paper shadow boxes can be traced back to ancient China, where paper cutting was a popular art form. These intricate designs were often used as window decorations and later evolved into three-dimensional shadow boxes. In the 18th century, cut paper shadow boxes gained popularity in Europe, particularly in Germany and Switzerland, where they were known as "Scherenschnitte." These boxes featured elaborate scenes and were often used as decorative elements in homes and churches.

Techniques for Creating Cut Paper Shadow Boxes
Creating a cut paper shadow box involves several key techniques:
1. Paper Cutting
1. Paper

The choice of paper is crucial for the durability and appearance of the shadow box. High-quality paper with a smooth surface is ideal for cutting intricate designs. Acid-free paper is recommended to prevent discoloration and fading over time.
2. Shadow Box
The shadow box provides the frame and depth for the cut paper design. Shadow boxes come in various sizes and depths, allowing artists to customize the size and dimensions of their artwork.
3. Backing
The backing material supports the cut paper and provides a backdrop for the design. Black or dark-colored backing is often used to create a dramatic contrast against the light-colored paper.

4. Lighting
The type of lighting used in the shadow box can significantly impact the overall effect. Natural light provides a soft and diffused illumination, while artificial light can be used to create more dramatic effects. LED strips are a popular choice for providing even and consistent lighting.
Inspiration and Design Considerations

Creating a cut paper shadow box requires creativity and an eye for detail. Here are some considerations for designing and finding inspiration for your artwork:
1. Subject Matter
The subject matter of your shadow box can be anything from landscapes and portraits to abstract designs. Consider your interests and personal style when choosing a theme.
2. Color and Texture

The colors and textures of the paper you use can greatly enhance the visual appeal of your shadow box. Experiment with different combinations to create a harmonious and visually striking composition.
3. Depth and Perspective
Layering the paper creates depth and perspective in your shadow box. Consider the placement of each layer to guide the viewer’s eye and create a sense of space.
Conclusion
Cut paper shadow boxes are a beautiful and versatile art form that allows artists to express their creativity and create stunning three-dimensional works of art. By combining intricate paper cutting with the depth of a shadow box, artists can bring scenes and stories to life in a captivating and unique way. The techniques and materials involved in creating cut paper shadow boxes are accessible to both beginners and experienced artists alike, making this art form a rewarding and enjoyable endeavor.
Frequently Asked Questions
1. What is the best type of paper to use for cut paper shadow boxes?
Acid-free paper with a smooth surface is ideal for cutting intricate designs.
2. How do I illuminate my shadow box?
You can use natural light, artificial light, or LED strips to illuminate your shadow box.
3. How do I prevent the cut paper from warping?
Use a spray adhesive or fixative to help prevent the cut paper from warping.
4. Can I sell my cut paper shadow boxes?
Yes, you can sell your cut paper shadow boxes online or through art galleries.
5. What are some tips for beginners?
Start with simple designs and gradually work your way up to more complex ones. Practice cutting paper to improve your precision. Experiment with different colors and textures to find what works best for your artwork.


