How to Make a Light Box with Cricut: A Comprehensive Guide
Introduction
Light boxes, with their captivating illuminated messages and designs, are a popular decorative element for homes, businesses, and special events. Using a Cricut machine, you can effortlessly create custom light boxes that reflect your unique style and bring a touch of radiance to any space. This comprehensive guide will walk you through the entire process, from gathering materials to crafting your own stunning light box.


Table of Content
Materials You’ll Need

Light boxes, with their captivating illuminated messages and designs, are a popular decorative element for homes, businesses, and special events. Using a Cricut machine, you can effortlessly create custom light boxes that reflect your unique style and bring a touch of radiance to any space. This comprehensive guide will walk you through the entire process, from gathering materials to crafting your own stunning light box.
- Free Shadow Box Template Svg Free Shadow Box Template SVG: A Comprehensive Guide To Creating Stunning 3D Art
- How To Make Shadow Box Svg Files Free How To Create Stunning Shadow Box SVG Files For Free
- 3d Svg Shadow Box 3D SVG Shadow Box: A Comprehensive Guide To Creating Stunning Artwork
- 3d Shadow Box Svg Free 3D Shadow Box SVG: A Comprehensive Guide To Creating Depth And Dimension
- Shadow Box With Light Shadow Box With Light: Elevate Your Display With Illumination
Materials You’ll Need
- Cricut machine
- Cricut Design Space software
- Cutting mat
- Open Cricut Design Space: Launch the software and create a new project.
- Choose a Design: Browse or upload your desired design. For a light box, consider using fonts, shapes, or images that will allow light to pass through.
- Adjust the Design: Resize and arrange the design to fit the dimensions of your light box base.
- Select Translucent Material: Choose the appropriate material setting in Cricut Design Space for the type of translucent material you are using.
- Cut the Material: Place the translucent material on the cutting mat and insert it into the Cricut machine. Follow the software prompts to cut the design.
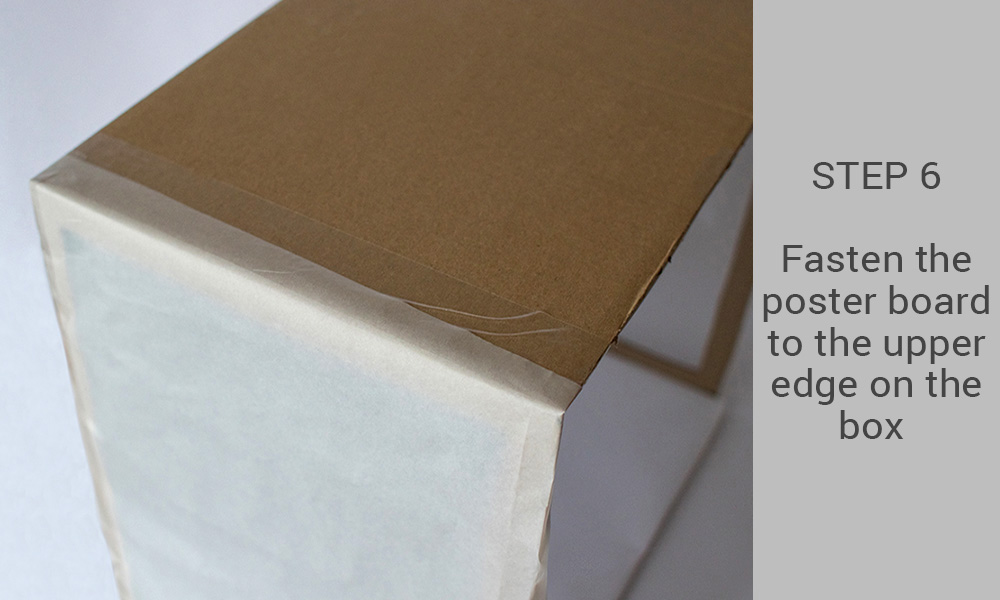
- Attach the Translucent Material: Use adhesive to attach the cut design to the light box base. Ensure that the design is centered and aligned properly.
- Insert the Light Source: Place the LED strip or fairy lights inside the light box, ensuring that they cover the entire surface of the design.
- Close the Light Box: If your light box base has a removable top or lid, close it to secure the light source and translucent material.
- Add Embellishments: Enhance the light box by adding embellishments such as glitter, paint, or vinyl decals.
- Create Multiple Layers: Cut multiple layers of translucent material with different designs to create a dimensional effect.
- Change the Light Source: Experiment with different colors or intensities of light to alter the ambiance of the light box.

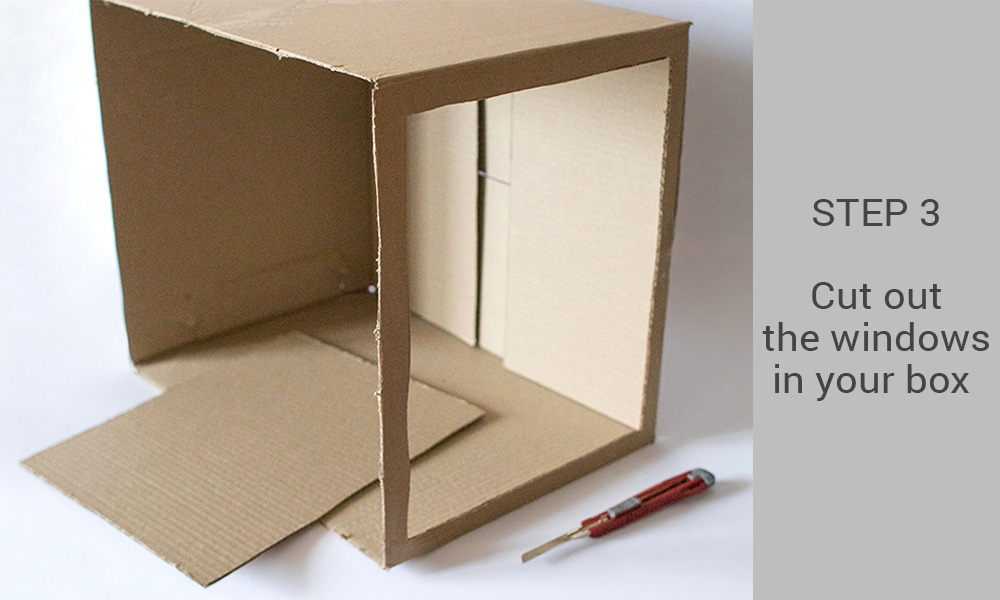
Step 1: Design and Cut the Translucent Material


Step 2: Assemble the Light Box

Step 3: Personalize and Customize
Conclusion
With a Cricut machine, you have the freedom to create unique and captivating light boxes that will illuminate any space. By following the steps outlined in this guide, you can effortlessly bring your designs to life and enjoy the radiance of your own custom light box.
FAQs
Q: What is the best type of translucent material to use?
A: Vellum, tracing paper, and frosted acrylic are all suitable options that allow light to pass through effectively.
Q: Can I use a Cricut Explore Air 2 to make a light box?
A: Yes, the Cricut Explore Air 2 is capable of cutting translucent materials.
Q: How can I change the color of the light?
A: Use colored LED strips or insert a colored filter between the light source and the translucent material.
Q: Can I create a light box with a specific size?
A: Yes, simply adjust the dimensions of your design in Cricut Design Space to match the desired size of your light box.
Q: How do I clean the light box?
A: Use a soft, damp cloth to gently wipe down the translucent material and light box base. Avoid using abrasive cleaners or detergents.